Avoiding deadstock is one of the key business strategies to run a profitable business. At the same time clearing the products by offering large discounts is not a good idea as it brings down your profit margins. Lifecycle markdown is a proven method to address both the issues at the same time.
What is Lifecycle Markdown?
Lifecycle Markdown is marking down your product prices in different phases as they age. Meaning, offer increasing value of discounts as the life of the product nears its end.
How to run Lifecycle Markdown?
Running lifecycle markdown requires little bit of planning ahead of time. Which means, you need to schedule the markdown sequences in advance. The Konigle app helps you to set up an automated lifecycle markdown sequence and measure the impact of such activity. Here is how you can do it:
1. Install the Konigle app in your Shopify store.
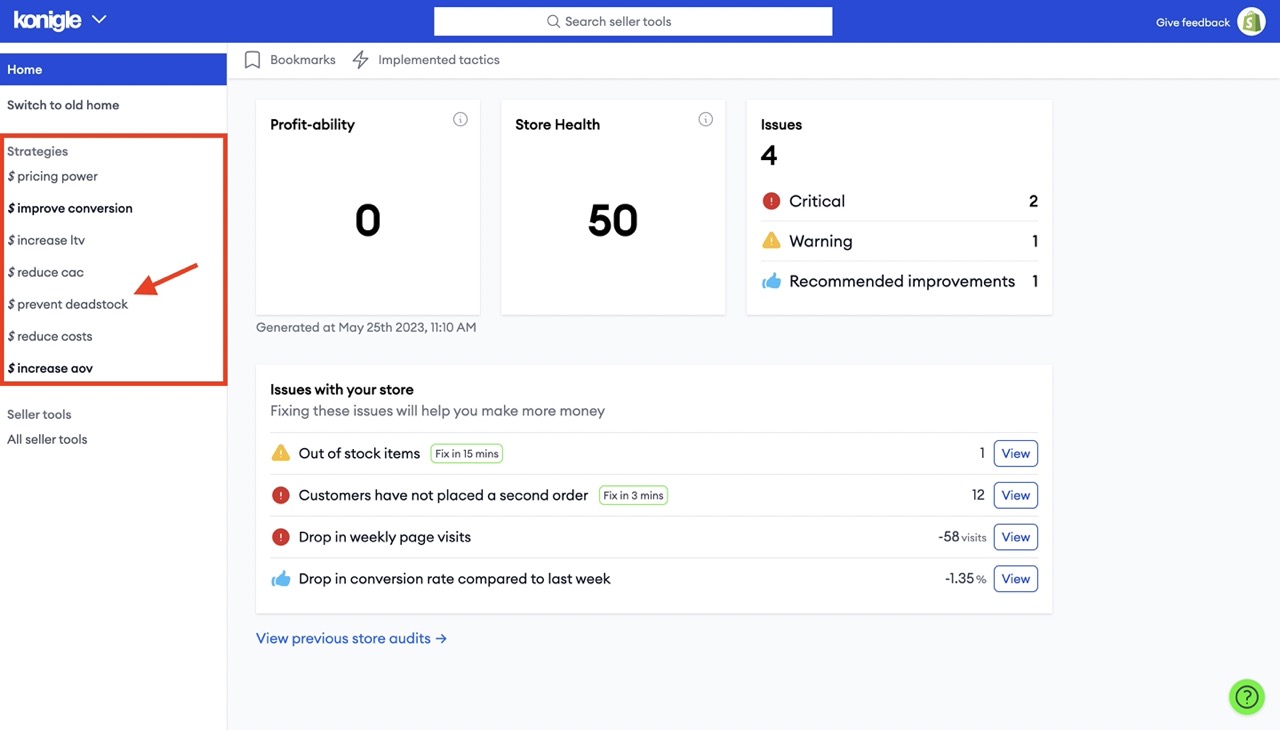
2. From your Konigle dashboard, navigate to 'prevent deadstock' strategy.
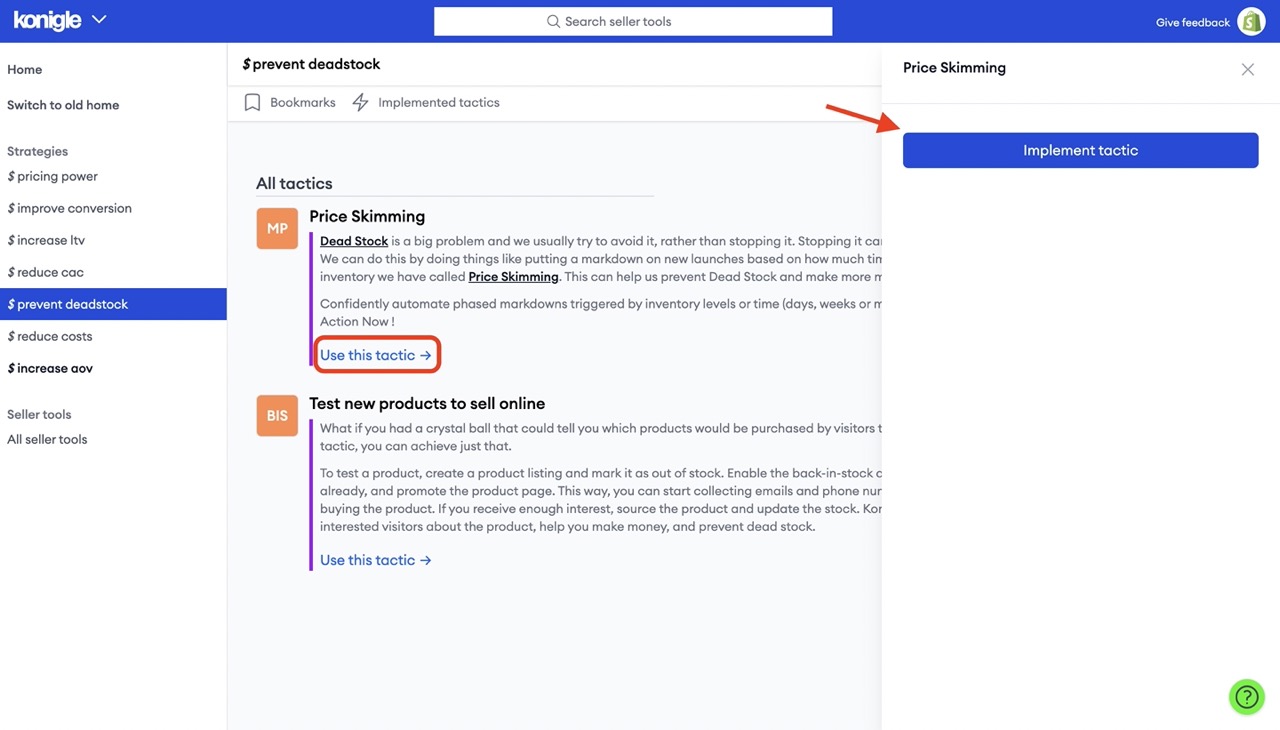
3. Implement the 'Price Skimming' tactic. You will be brought to the Markdown Planner tool.
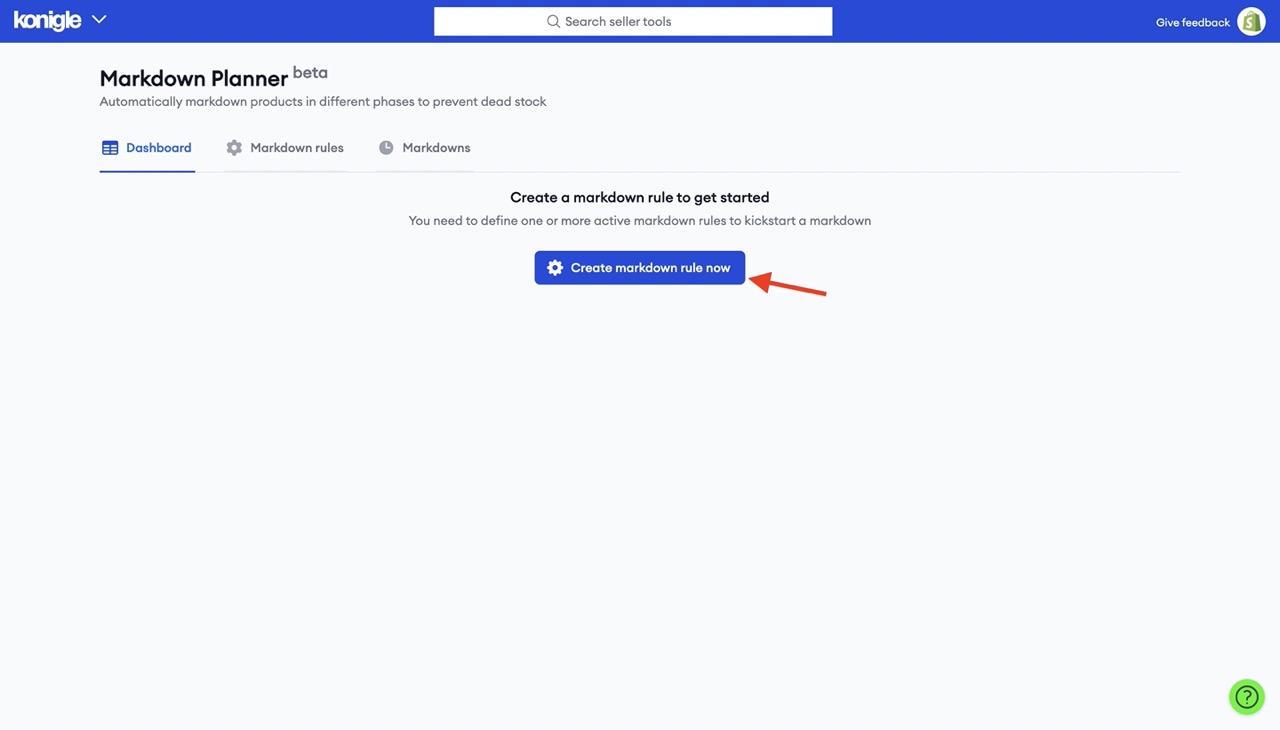
4. Click on 'Create markdown rule now'.
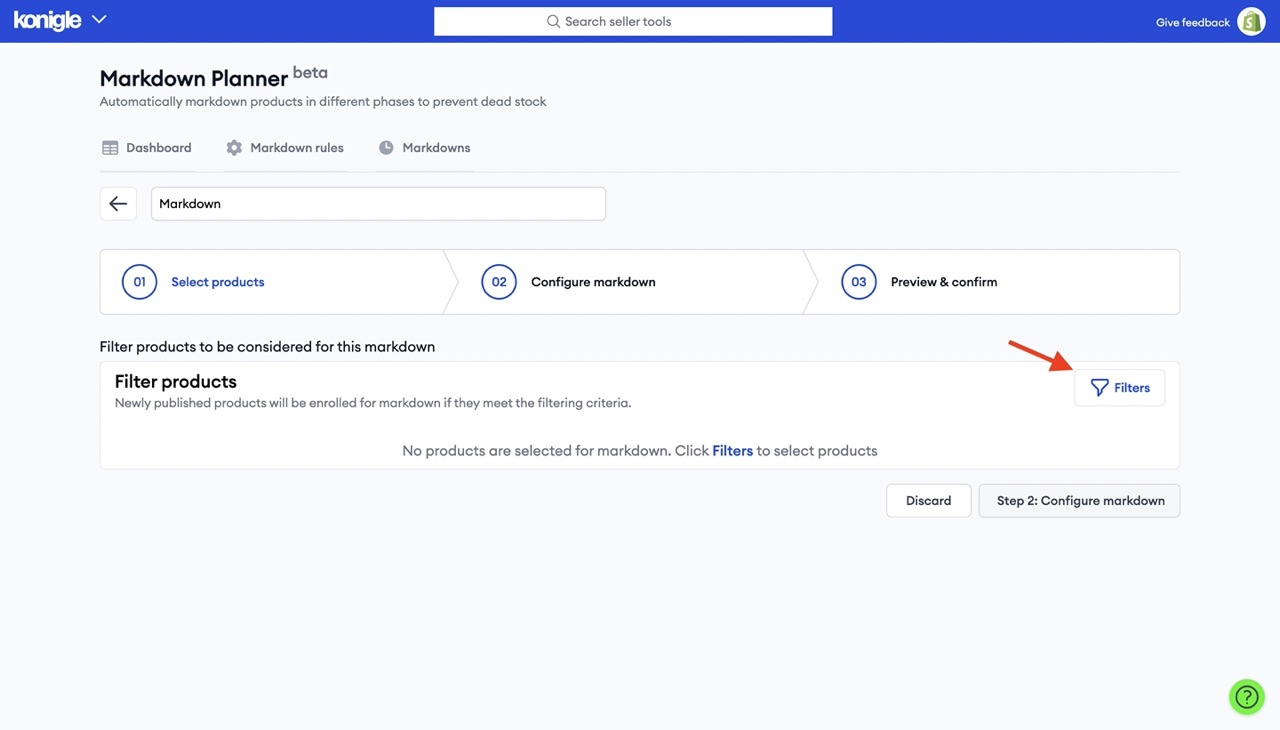
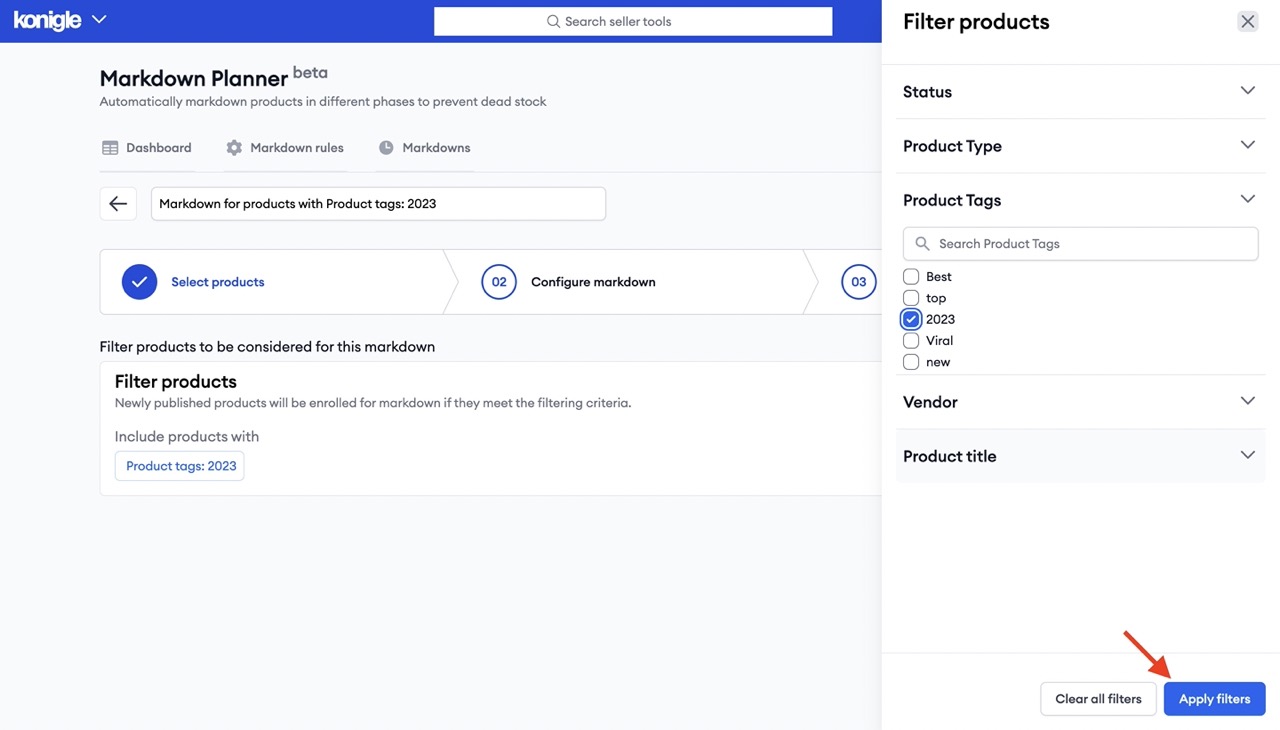
5. Start setting up your markdown sequence by filtering for products to include. From the Product Filters section, add one or more rules for filtering the products.
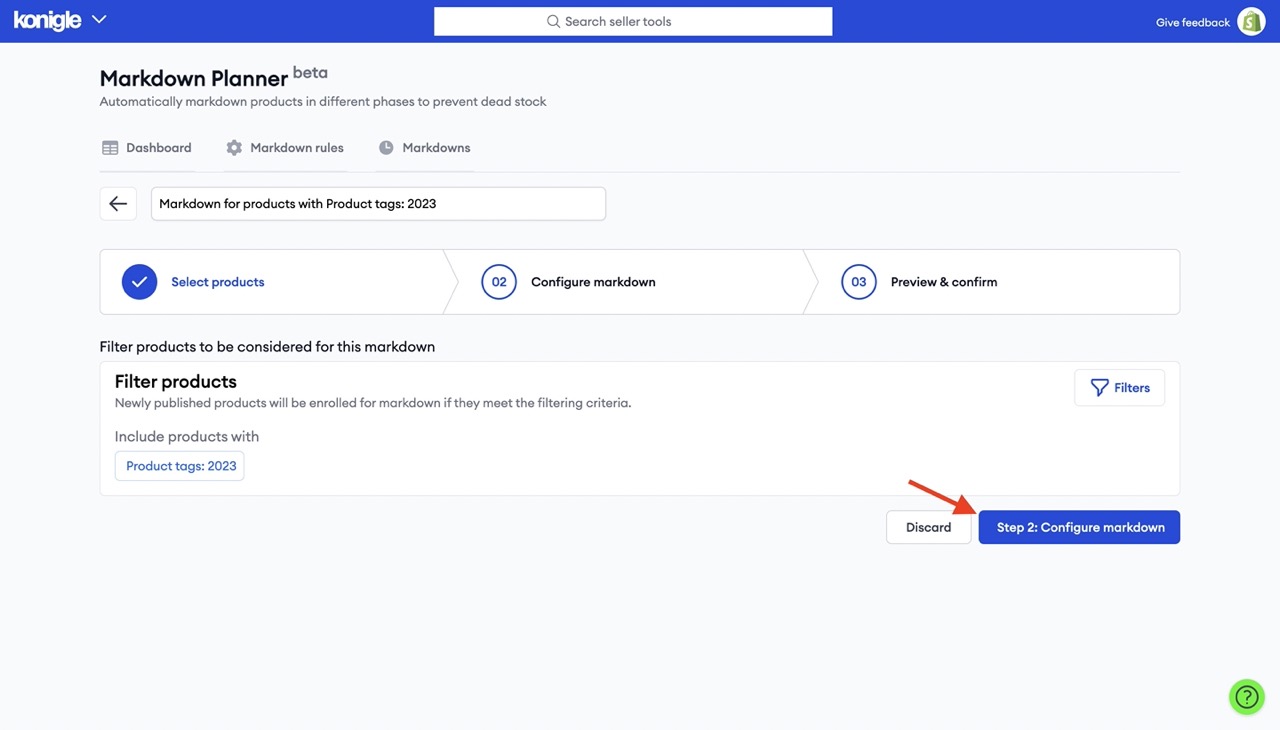
5. After relevant filters applied, click on 'Step 2: Configure markdown' to proceed.
6. Next step is to configure your markdown discount rules:
- For each rule you have to specify the 'Markdown Value' (in percentage) that you want to offer, and the 'Duration' (days / weeks / months) of the phase.
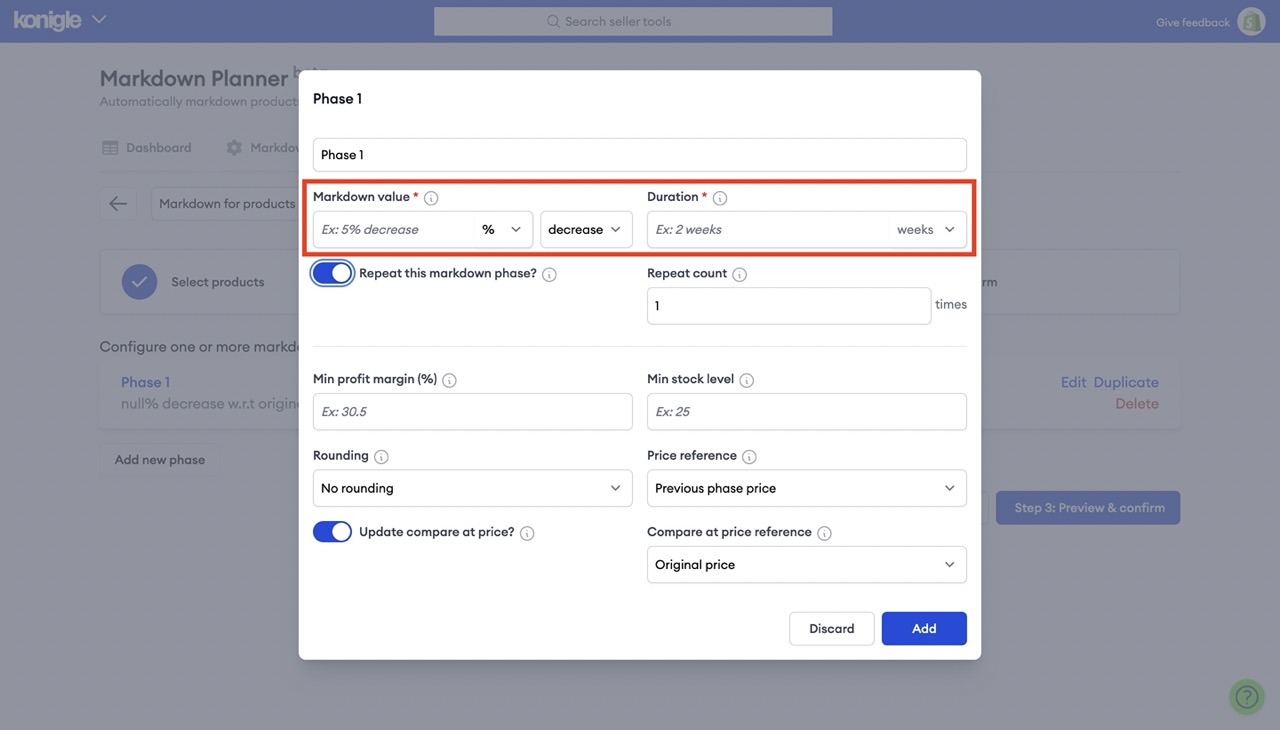
- By selecting 'Repeat this markdown phase?', it will result in the markdown being repeated by either 1) a specified number of times [depending on quantity added in 'Repeat count'] OR 2) when the 'Min profit margin (%)' [if specified] has been reached OR 3) when your product goes out of stock / 'Min stock level' reached [if specified].

- In the above example, a 5% decrease that last for a week has been inputted. When repeated for 4 times, it means that the whole markdown will last for a month (4 weeks) and each week, the selling price is decreased by 5% of the previous phase's price. This will occur until either 'Repeat count' of 4 has been met OR 'Min profit margin (%)' OR 'Min stock level' is reached, whichever comes first.
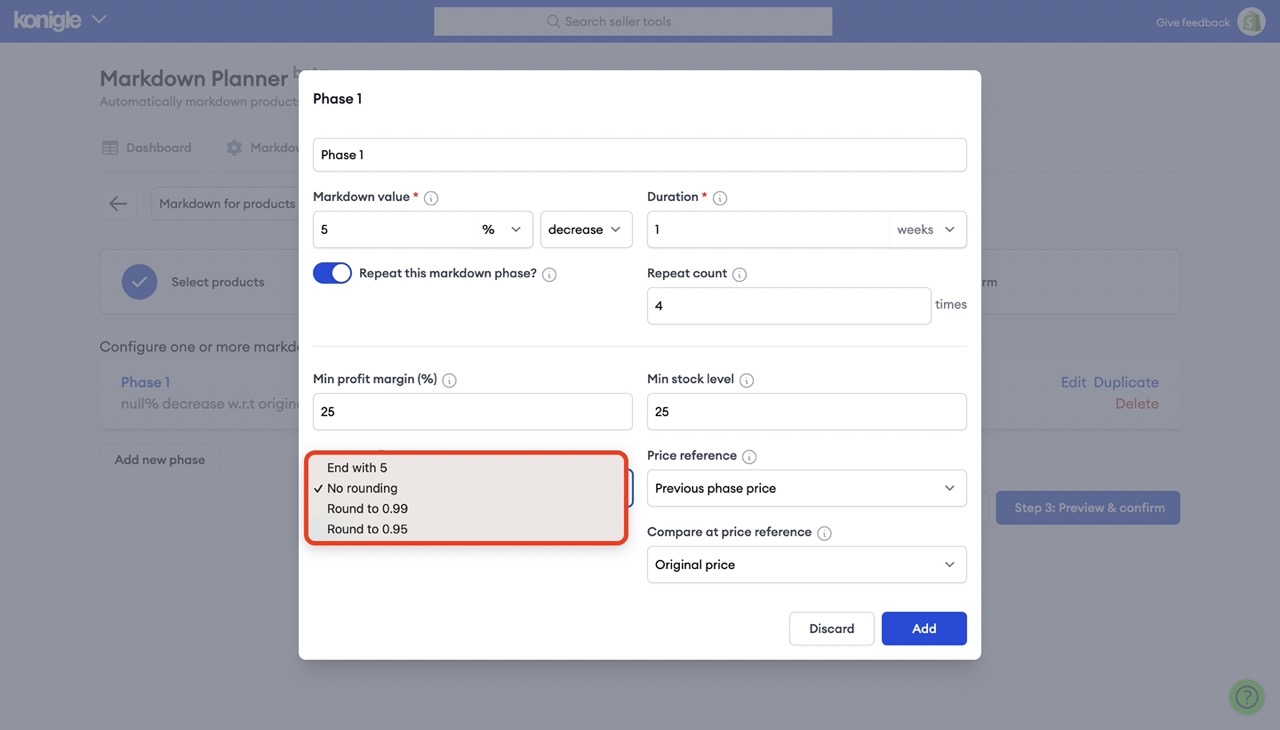
7. Apply Charm Pricing to your markdown phase to boost sales.
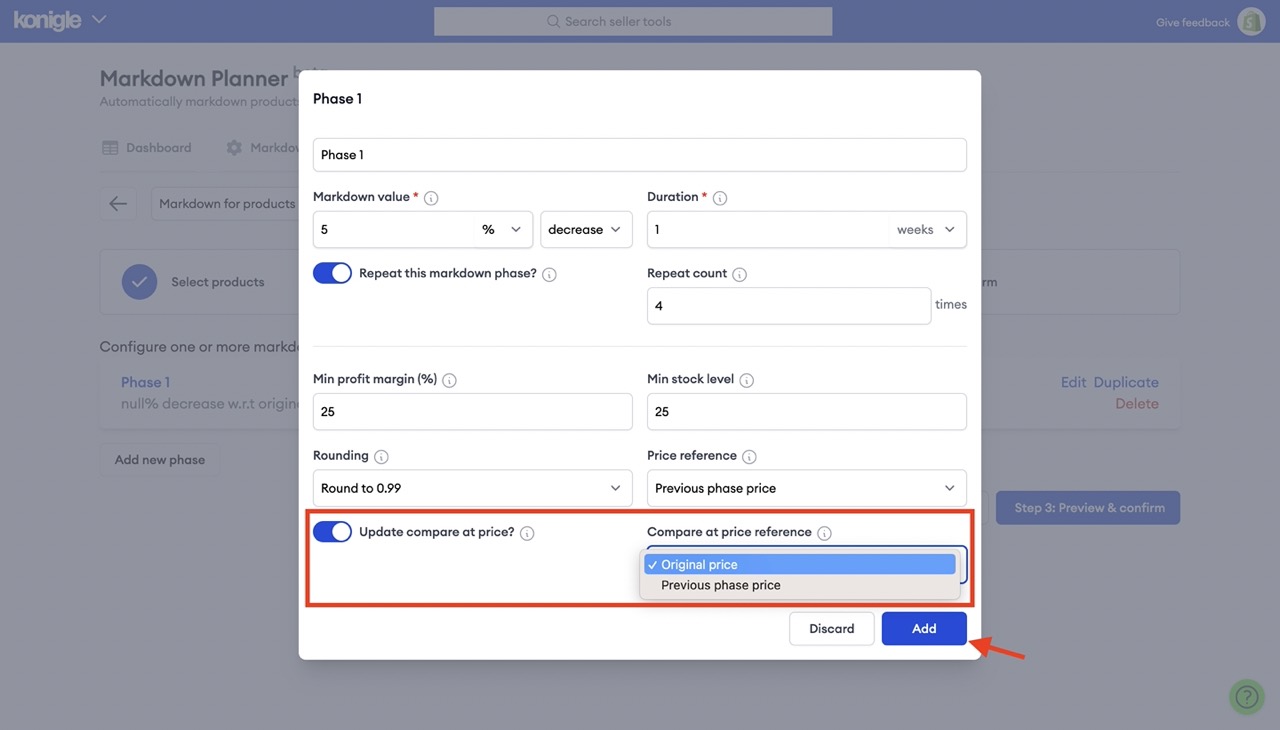
8. You can also choose to update your compare at prices w.r.t. your original prices or the previous phase's price. Then click 'Add' to finalise the configurations for Phase 1.
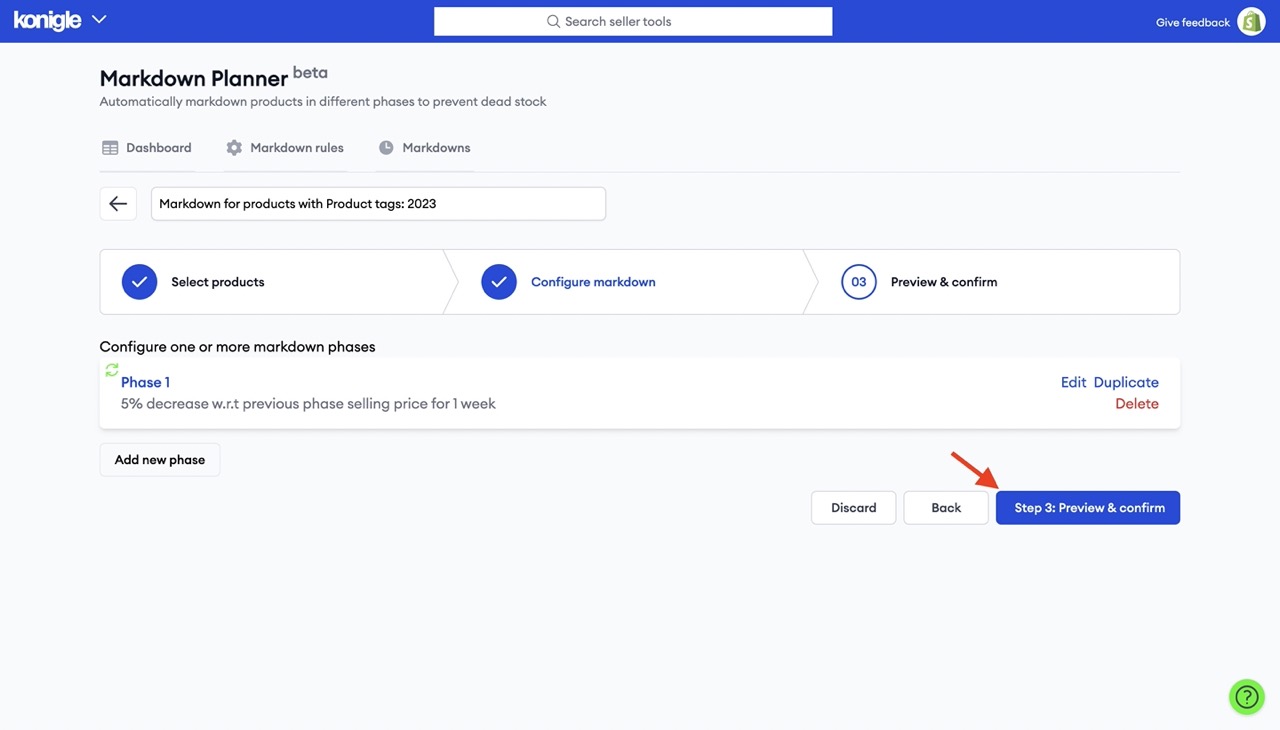
9. Once you're done adding phases, click 'Step 3: Preview & confirm' to proceed.
10. [Optional] Set a 'Valid from' date to determine when your markdown should begin, and a 'Markdown start offset (days)' if you do not want newly added / published products to be marked down immediately.
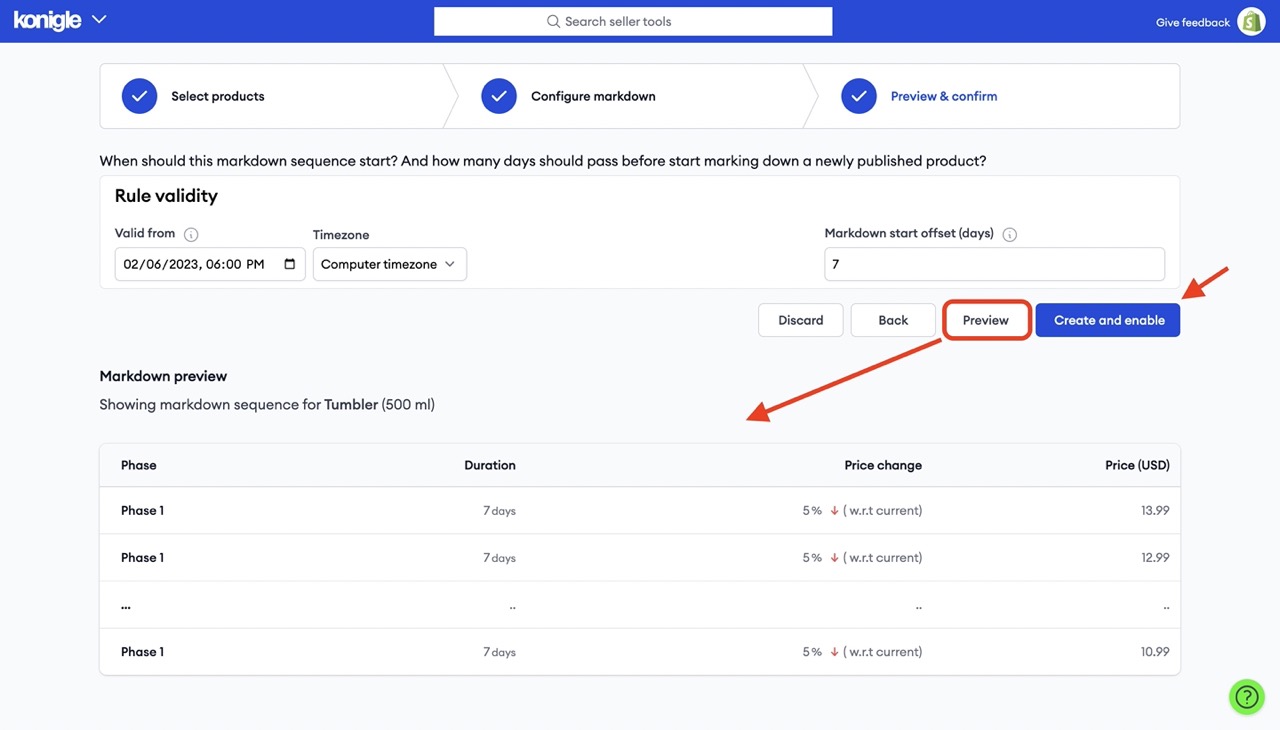
11. Press 'Create and enable' to schedule the markdown rule(s) created.
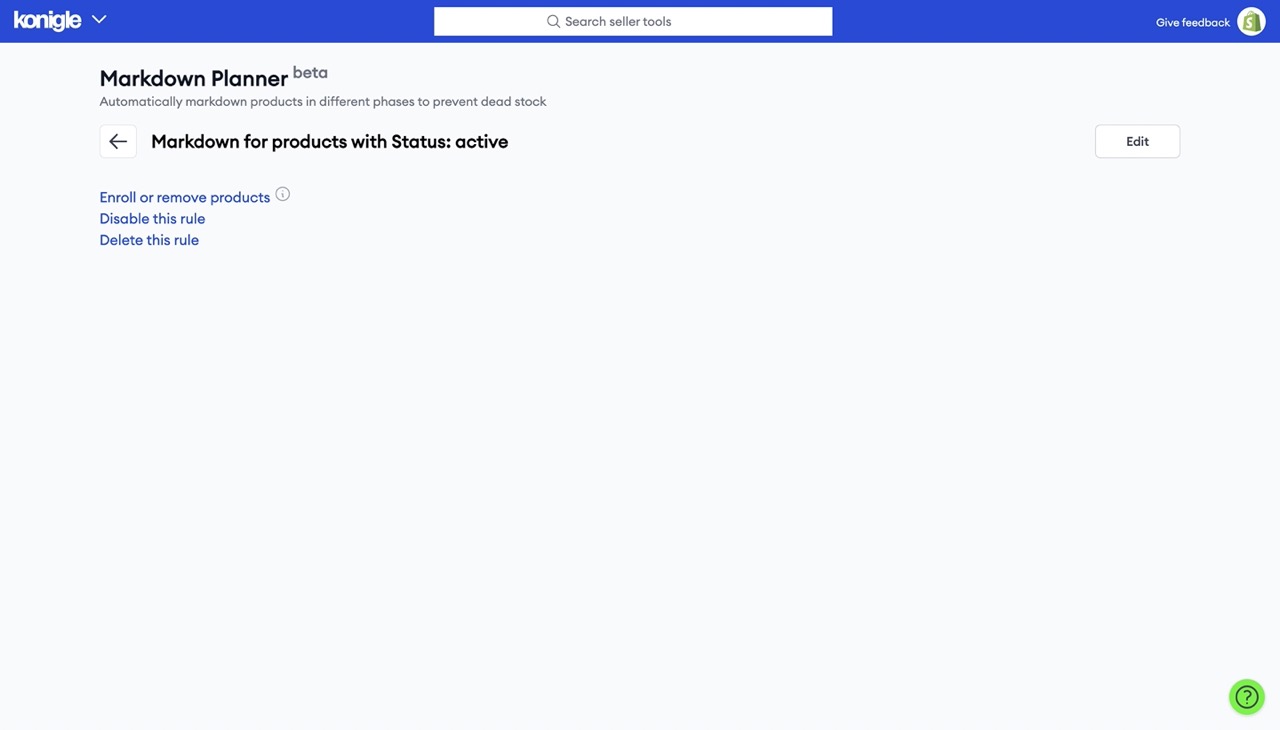
12. You can edit the markdown rule(s) created, enrol new products or remove products not meeting criteria, disable, or delete the created rule.
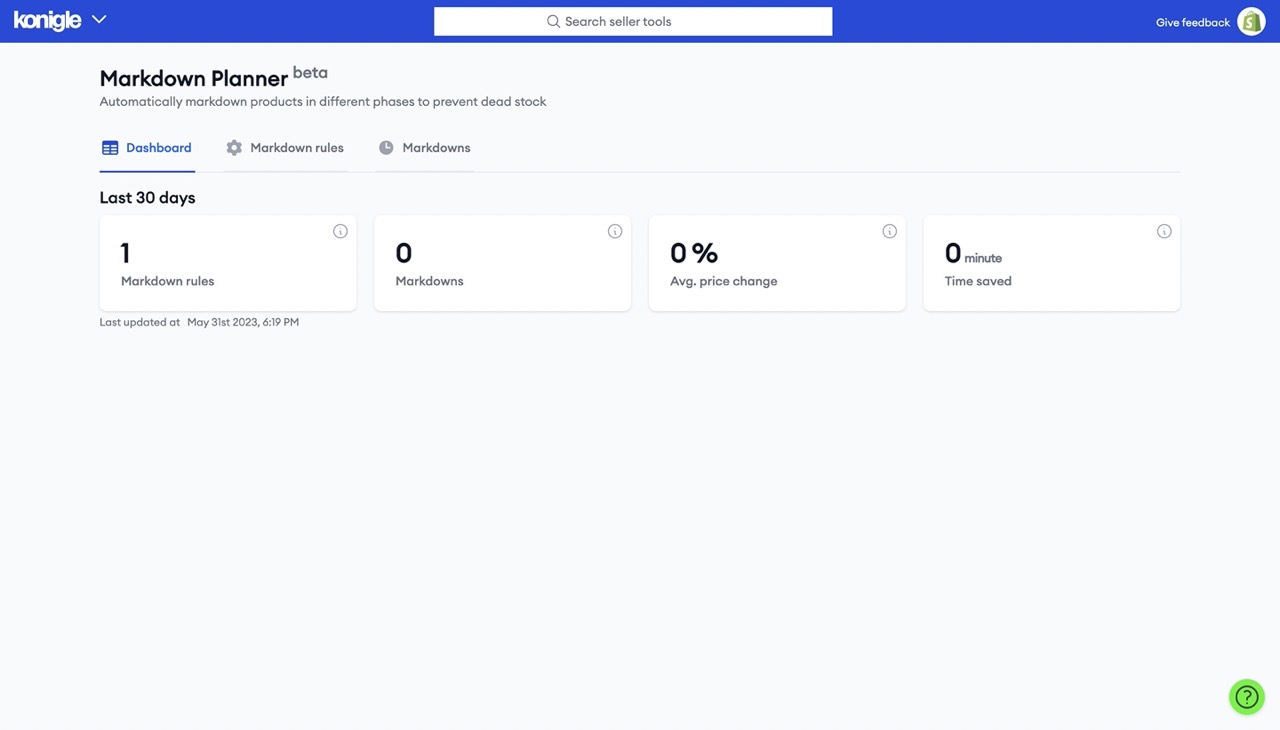
13. Lastly, from your Markdown Planner dashboard, you can see how many markdown rules you have, the average price change, and time saved.