
Deciding to migrate my WordPress website : Jankari Hindi Me to the Konigle Website Builder was a tough decision. I was also a little scared of the migration process. I was worried to mess with a live website. As
- It could bring technical difficulties,
- Konigle lacks 1-1 feature parity with WordPress,
- There could. be downtime and as this website gets 25k+ in traffic per month, I was worried of lost Ad Revenue,
- Also, I have a small emotional attachment to it because it was my first live project that I completed by myself, overcoming many difficulties and working hard during the COVID-19 pandemic. It was also my first source of income before I got a job.
- Additionally, Konigle would be more costly for me from hosting my current website for ~100$/year on a shared hosting provider, I would be paying ~$360/year with Konigle, though I would be getting far better hosting, many amazing features and also an email marketing software.
But having seen many successful websites running with Konigle and with a good understanding of Konigle (I recently started an online book store using Konigle), time savings and with so many features making it easy to implement tactics to grow traffic. And growing traffic was important to me, as I was losing traffic on the current WordPress website. I finally took the plunge to migrate my website and challenging myself to migrate the website within 3 days.
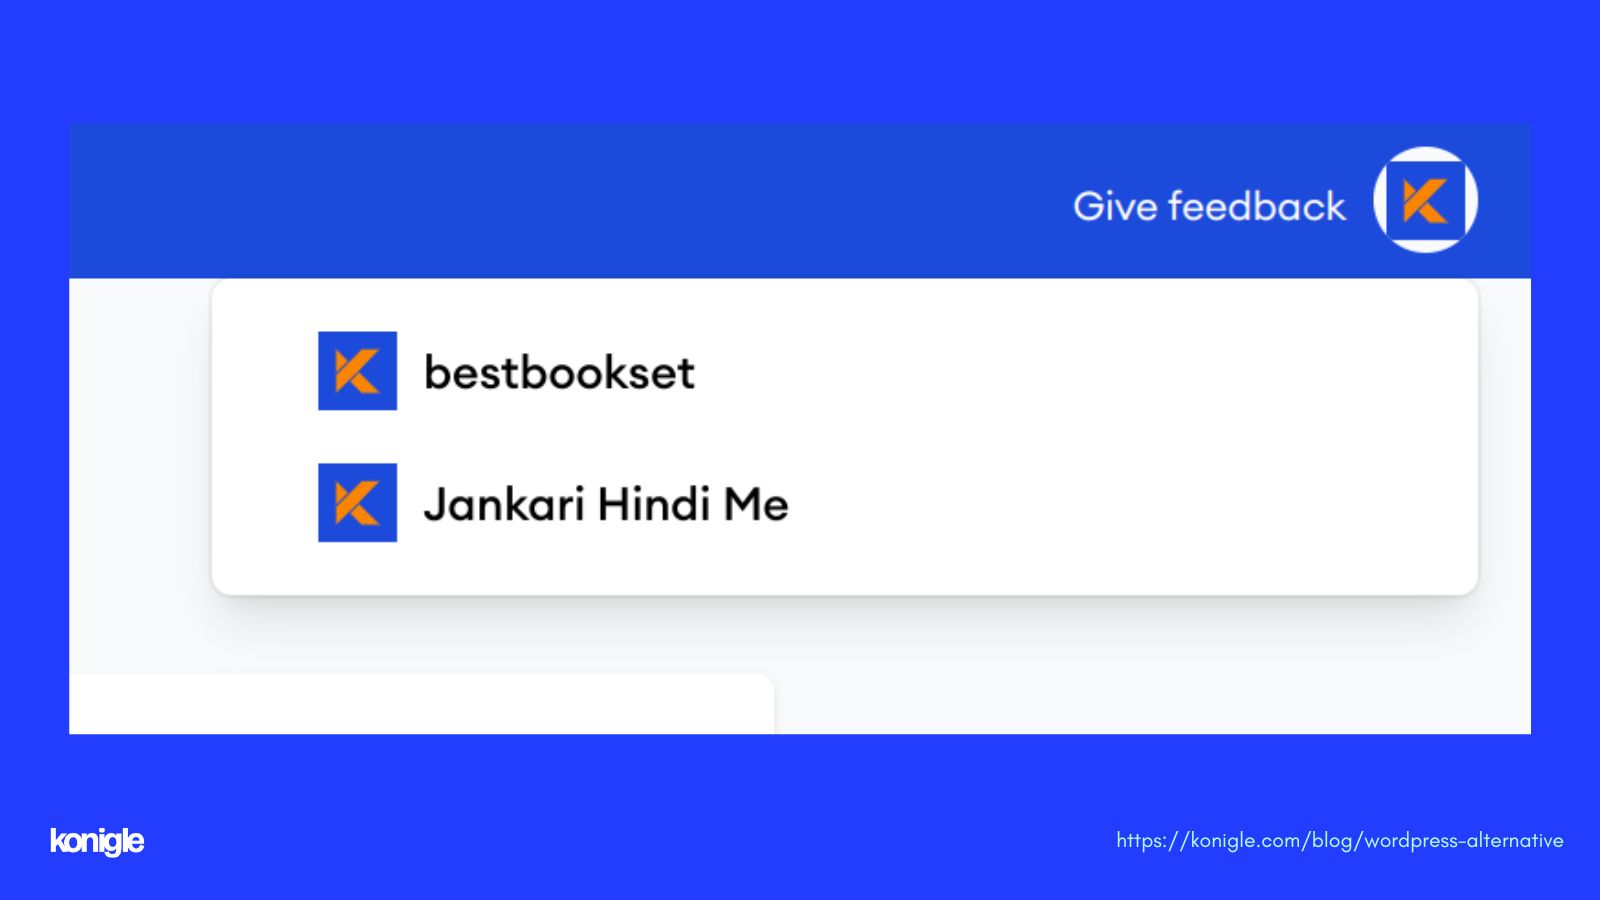
Here's my first hand account of the entire migration process. I did not have to sign up for Konigle as my account was already created when I started bestbookset.com. I just created another website inside the same account for jankarihindme.in, which created a konigle.net subdomain website that I could start migrating my blog to.
If you are looking to build your first website with Konigle, you can sign up at konigle.com/signup
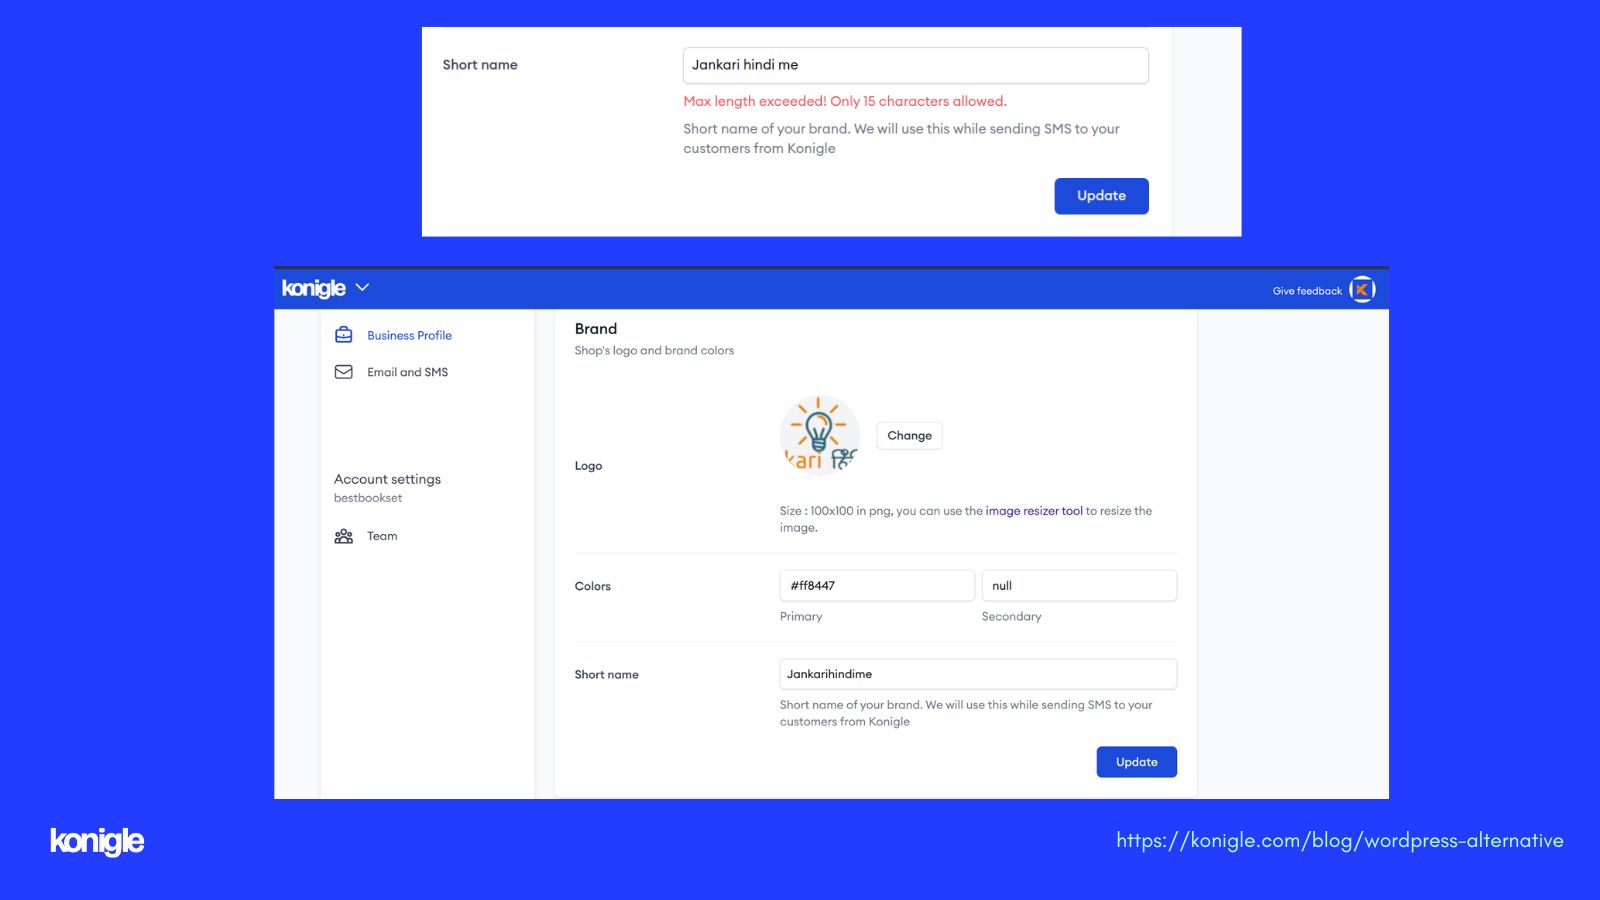
Once I gained access, I started uploading informational content on the Konigle website. Firstly, I went to the account settings to set the logo of my previous site.
Then, i set up the primary color and short name as "jankarihindime" But before that, I encountered an error indicating that the maximum length was exceeded due to spaces. To resolve this, I removed the spaces and joined the names to ensure they were under 15 characters.
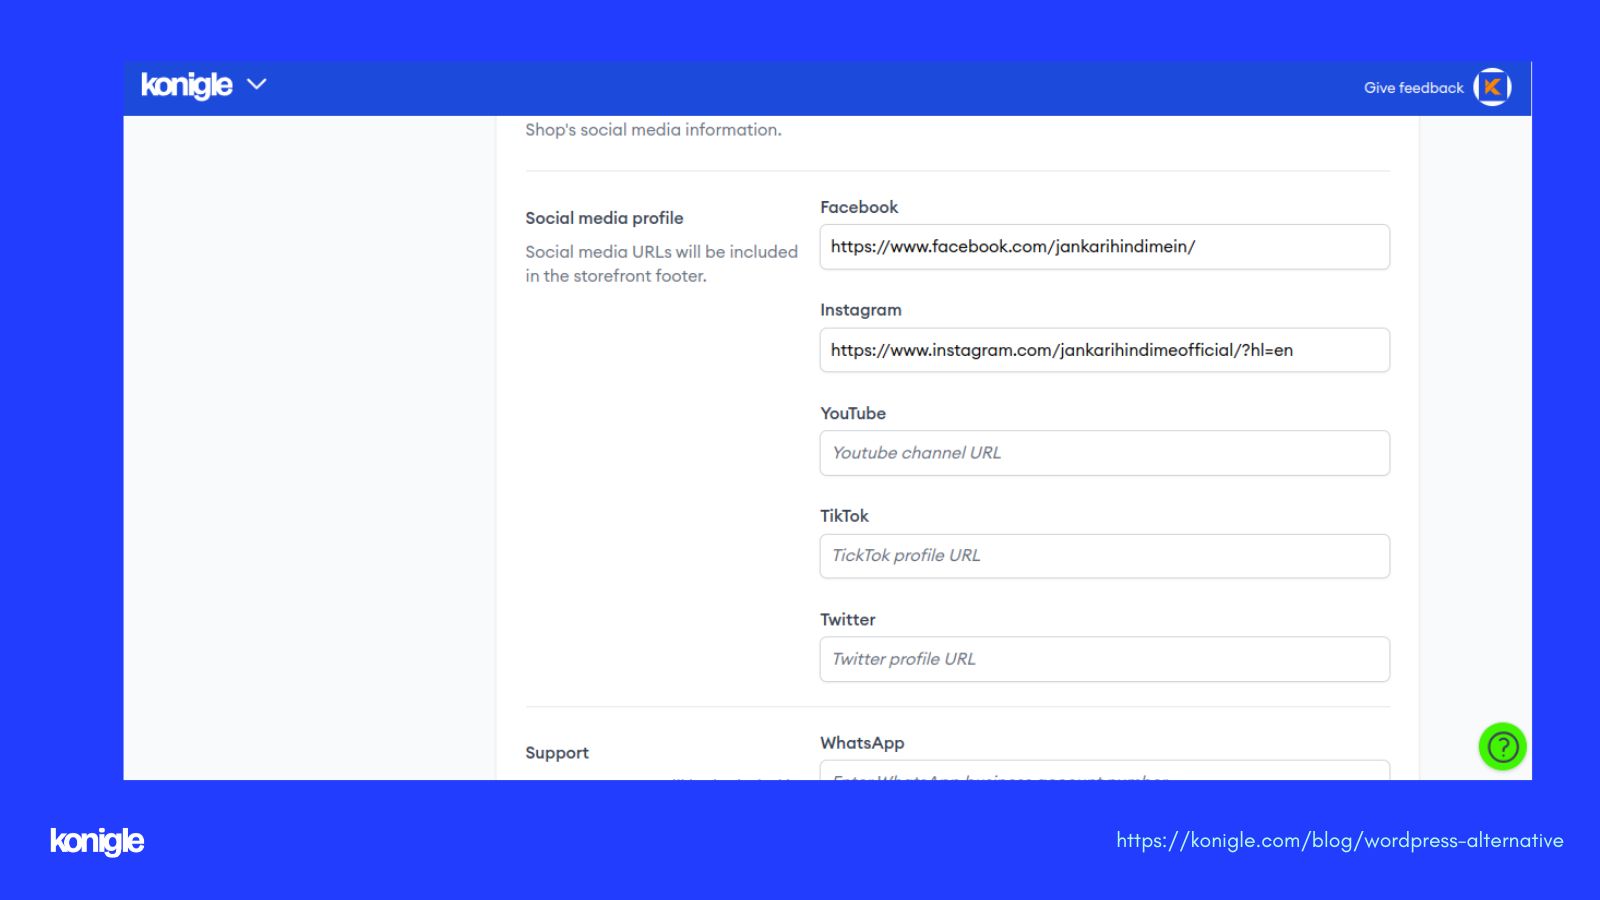
Then added the social URLs of my Facebook page and Instagram, but there is no option to add the LinkedIn URL, so I will leave it blank.
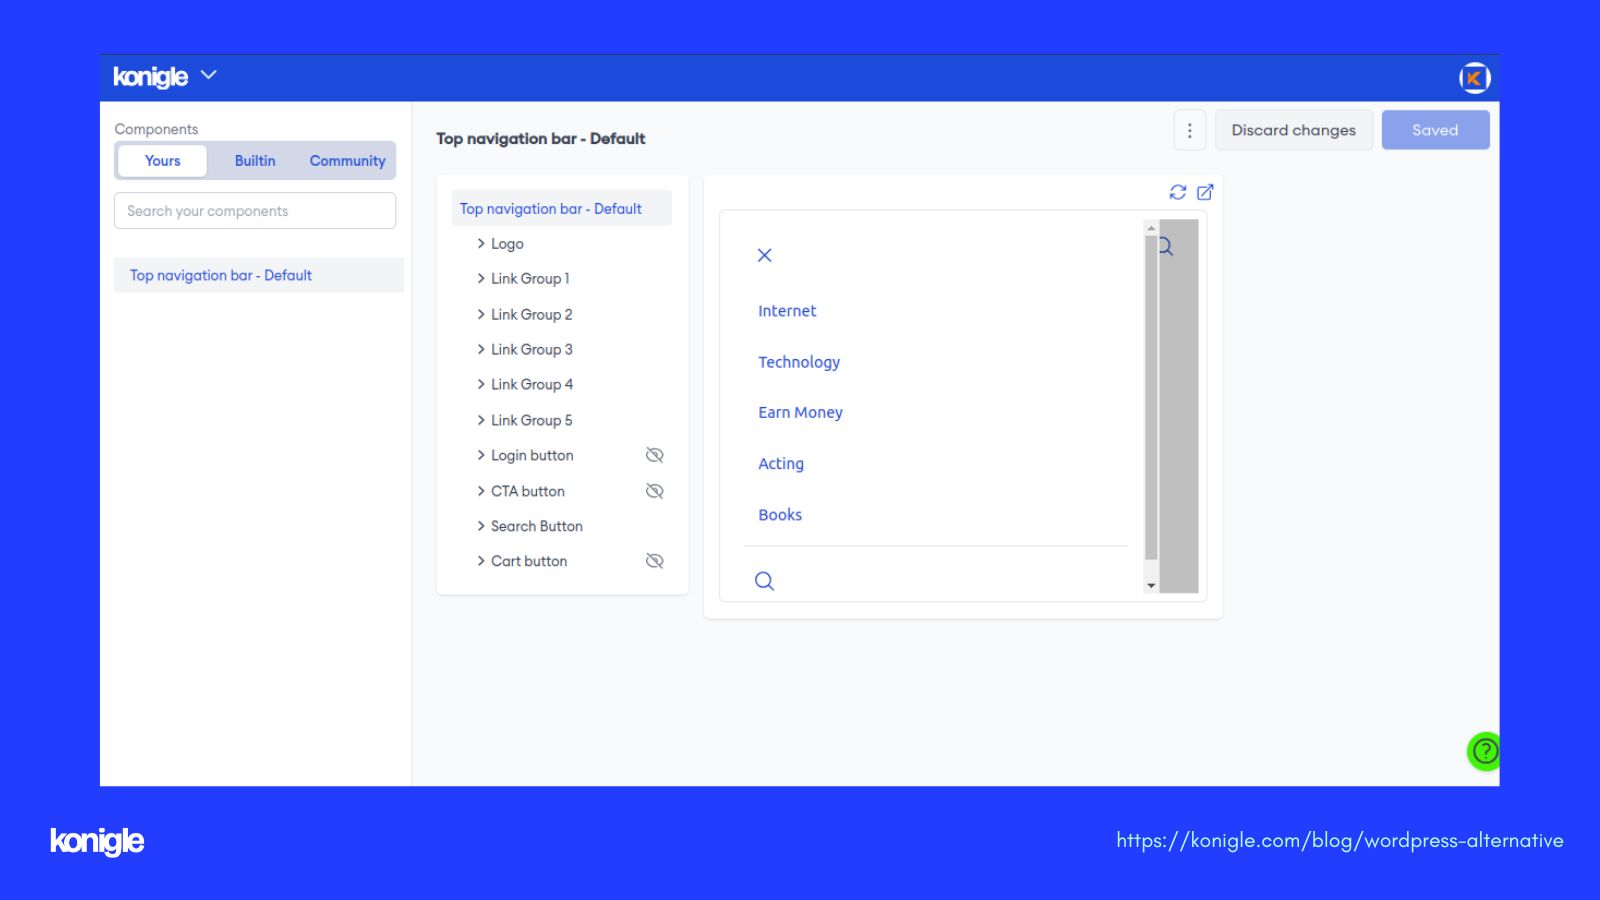
Afterward, I went to set up the navigation bar under the "Website" tab and then under the "Component Builder".
I selected the top nav bar component and added links to the navigation bar. Jankari has 7 menu links, but Konigle only supports 5. However, I have currently added 5 links and hidden the unwanted elements that were not on my previous website.
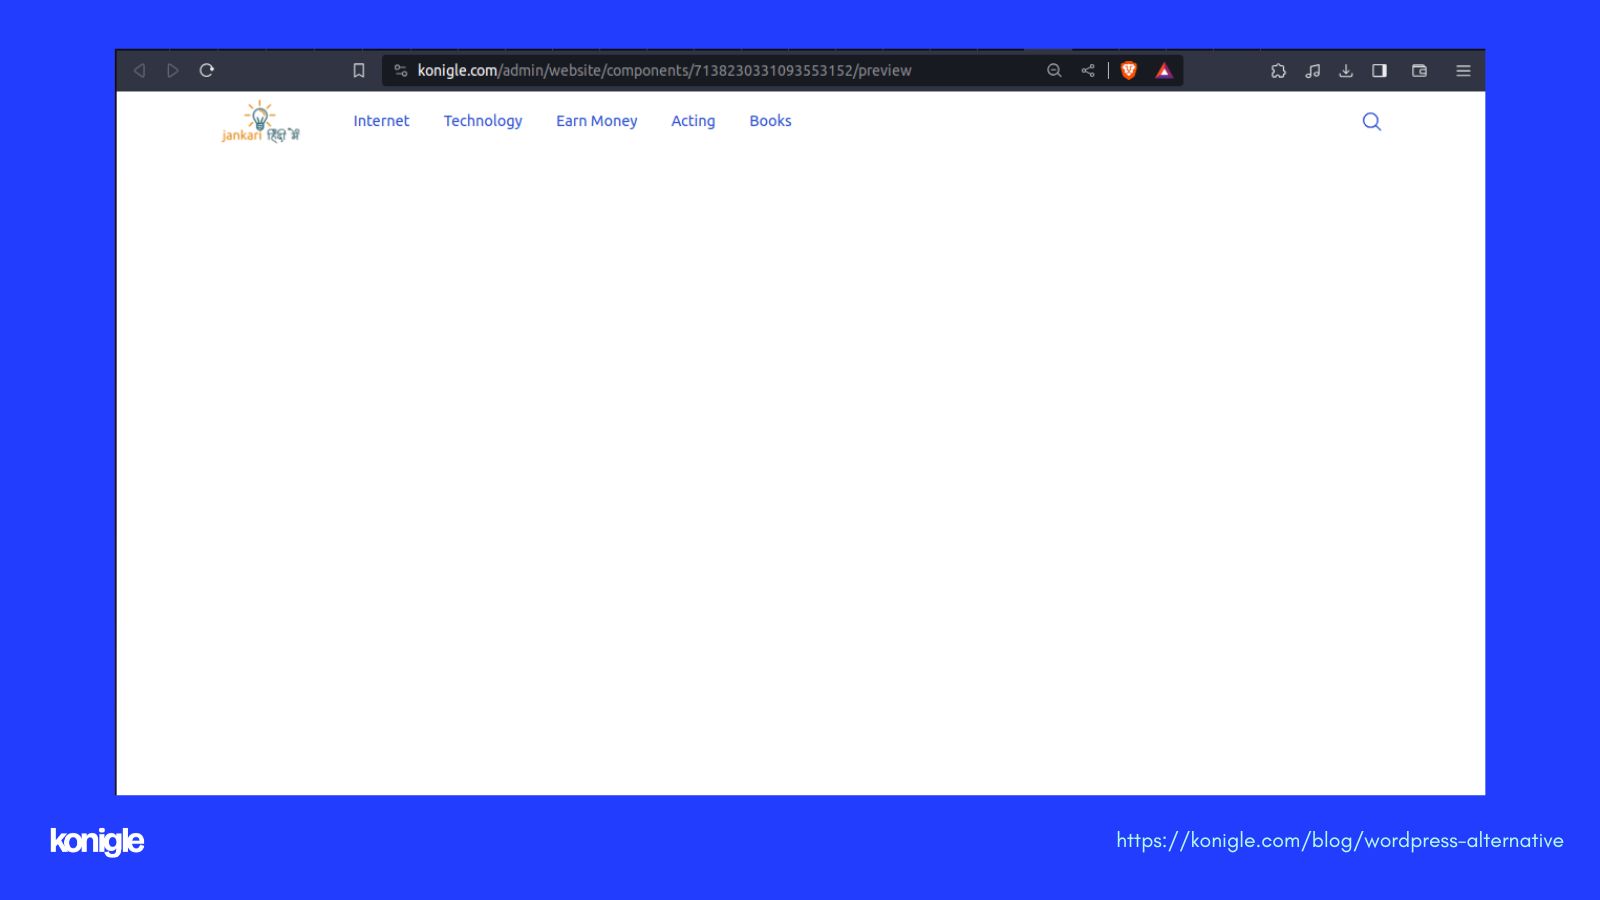
With all the tasks mentioned above completed, my website preview on Konigle currently looks like this.
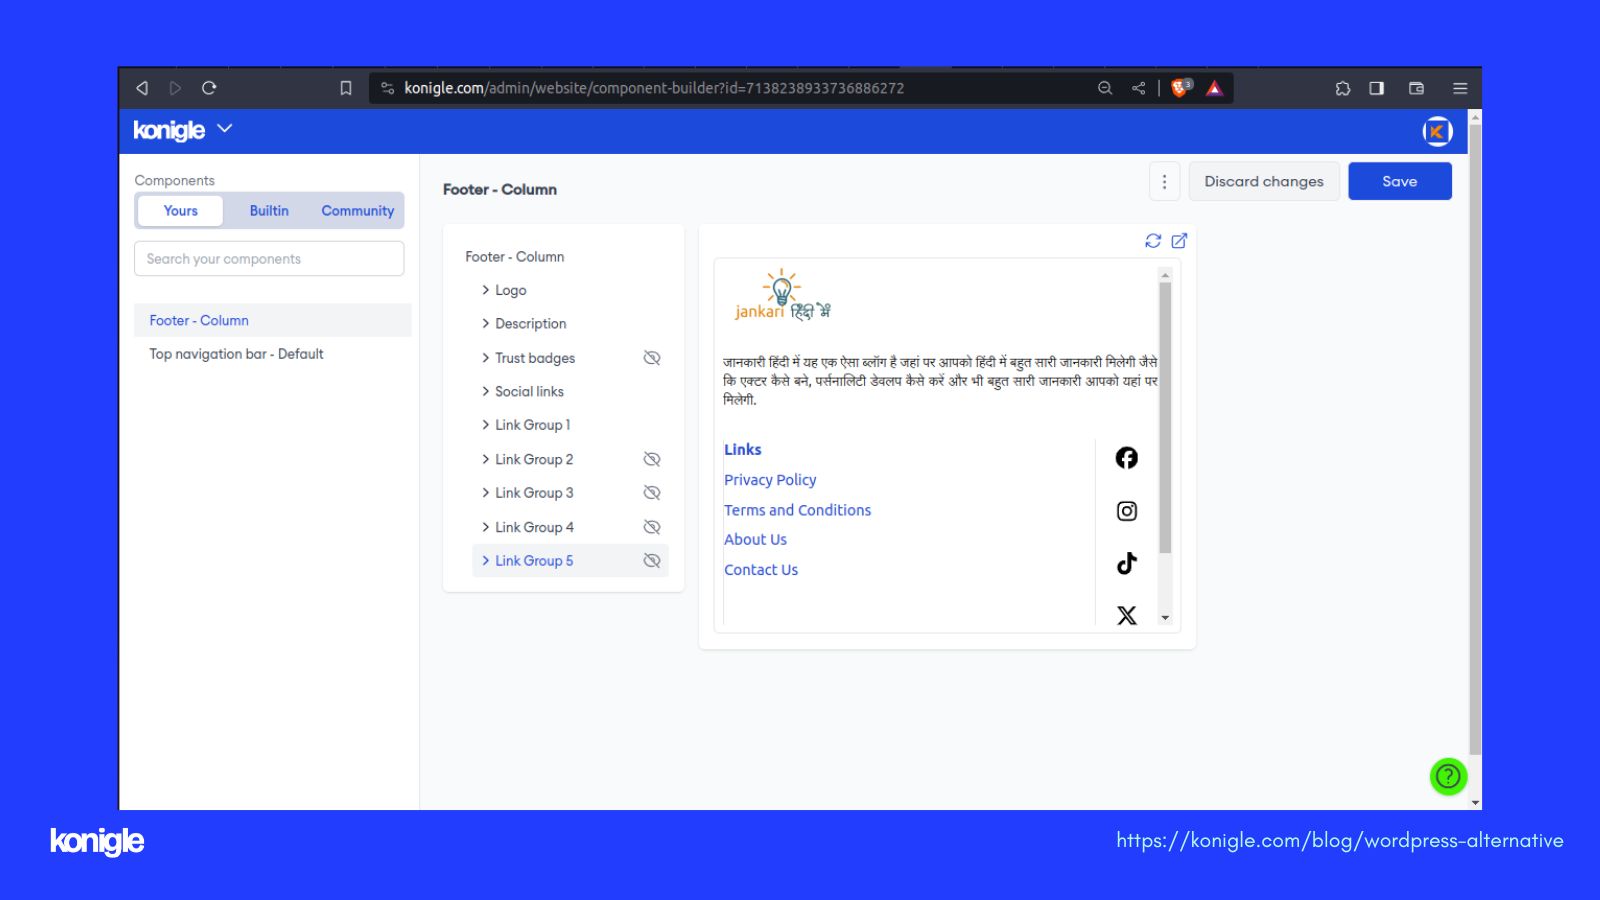
The next task is to set up the footer. So, I searched for a footer component in the component section that matches the "jankari hindi me" footer. I added links and descriptions. To make this component viewable on the website, go back to the pages and design section, and select the "footer" and "website" tab.
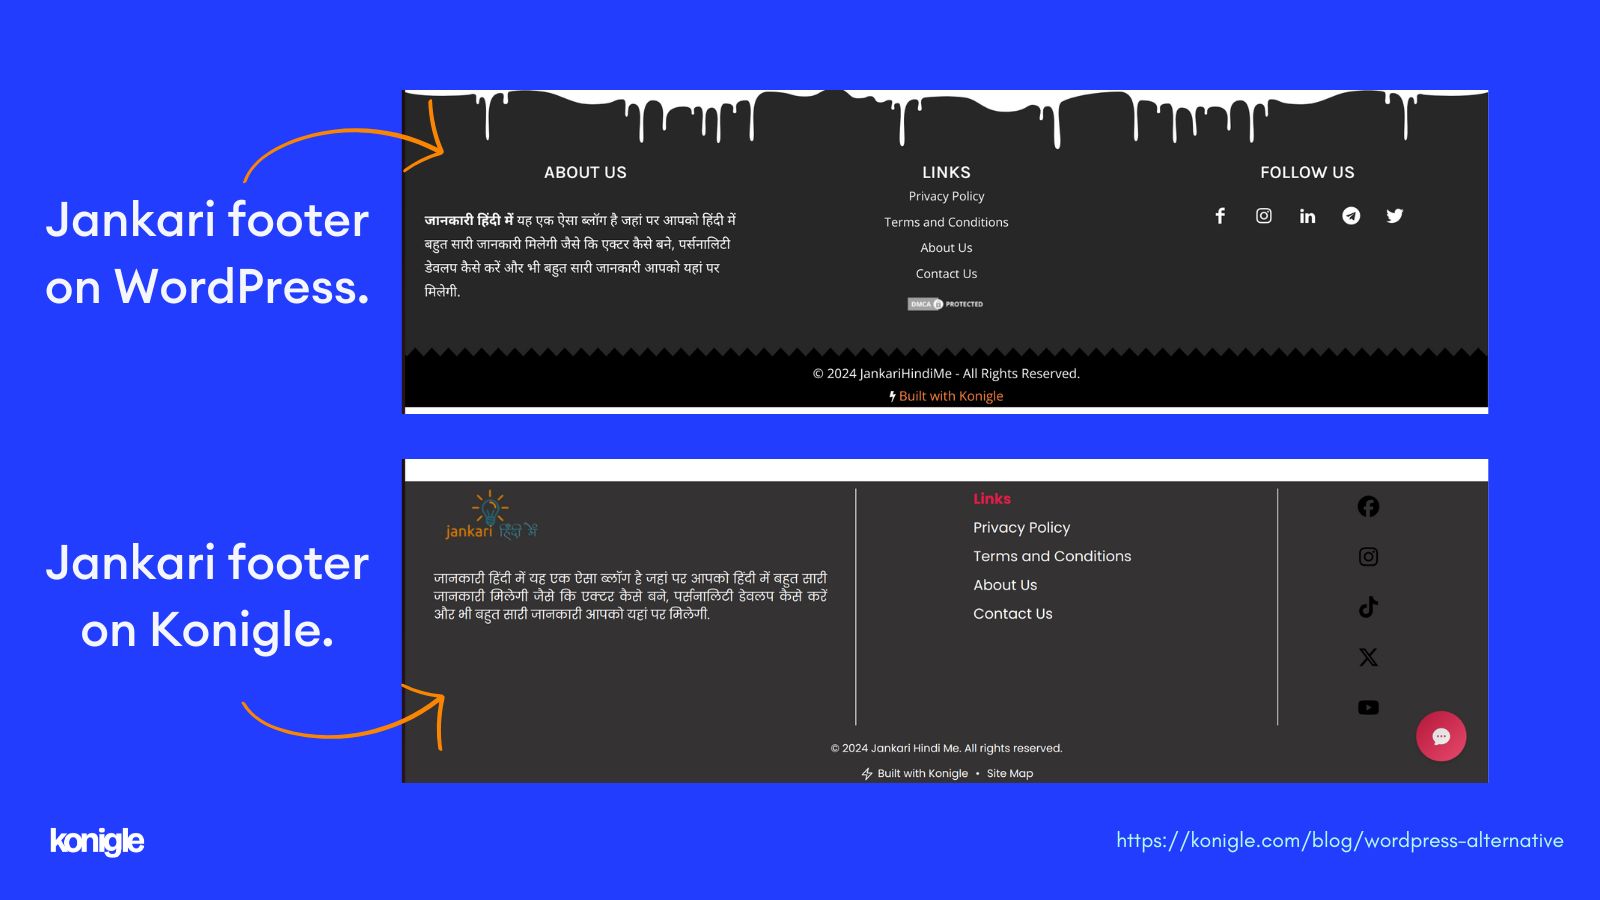
This is the preview of jankari on konigle, but it doesn't look exactly the same.
Next, I went to the blog section of Konigle, to begin migrating the blog.
After copying and pasting a blog post, the first thing I do is download the image from the previous blog post. Then, I upload it again in the same position in the blog post (konigle). However, in WordPress, I simply copy and paste the image. There is no need to upload it again in the background as it is automatically uploaded. This reduces time and effort for me.
Also, I have experienced that the table of contents and FAQs feature is not available on Konigle, which is very important for me from an SEO point of view.
- No need for an external webP plugin like in wordpress, Konigle automatically converts images to webP.
- Crawler View : I can now see exactly how a crawler sees my website and using the Robots.txt generator fine tune my robots.txt file the way I want.
- Schema View : I can now customise my schema the way I want without hassles introduced by plugins such as Yoast SEO or Rank Math in my previous wordpress website.
- Faster Indexing of pages : I can now bulk submit urls to Google Search Console. IndexNow and even SEO tools via built in indexing plugins.
- I was able to easily add redirects with proper sitemap updates without needing a clumsy redirect plugin like in my previous WordPress website.
After copying and pasting all of these things, I also started copying and pasting for pages. I also added the authors for the blog post from the author section.
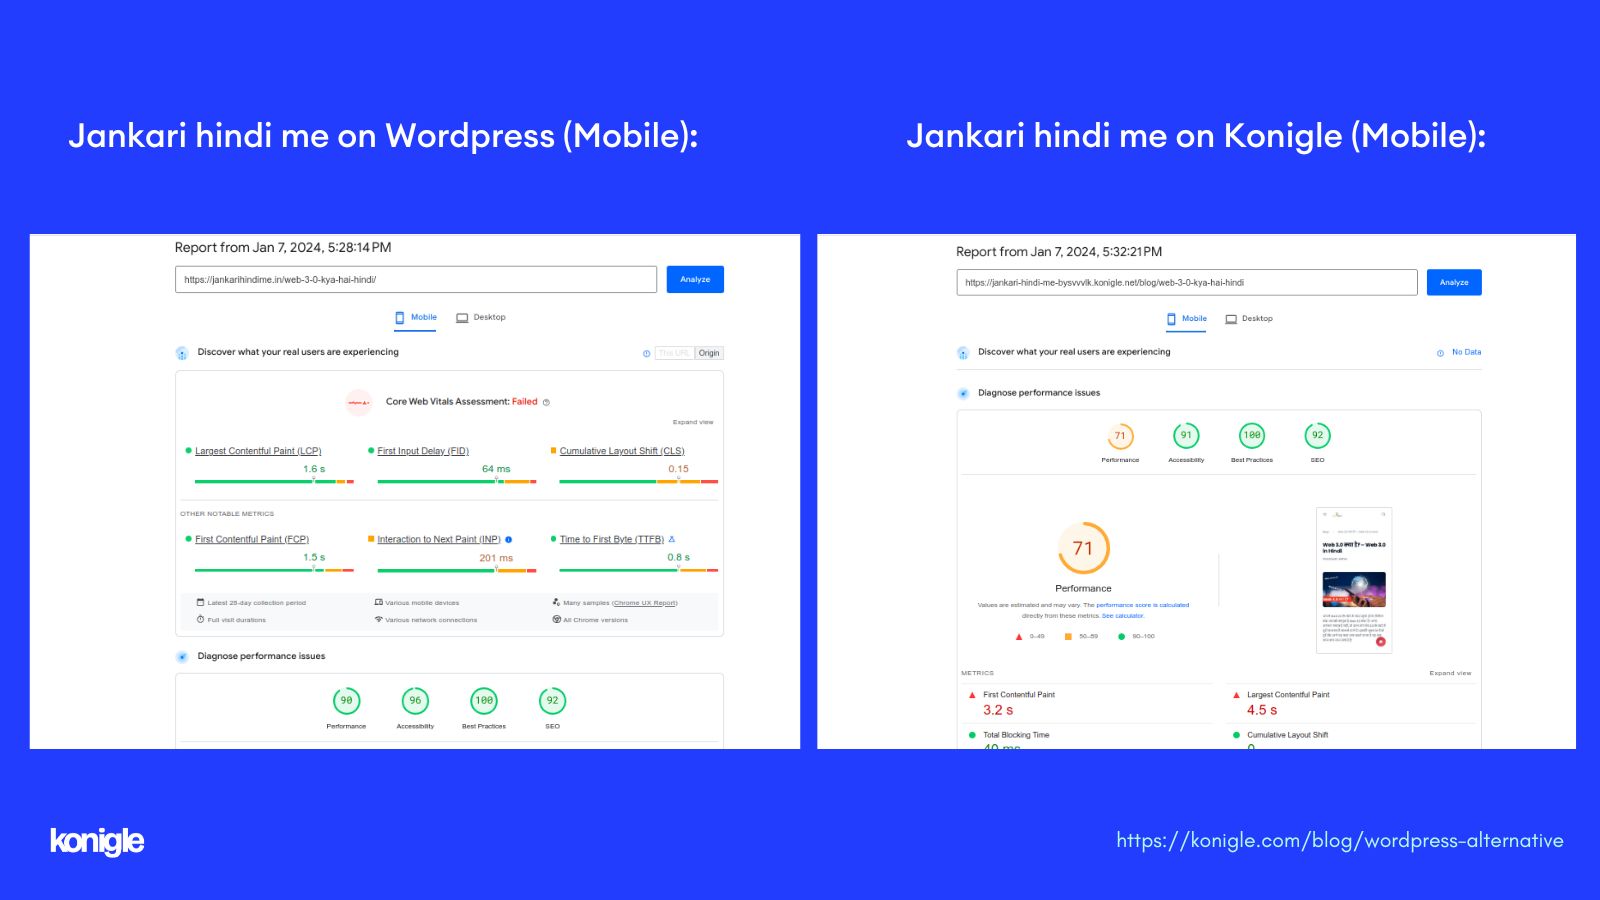
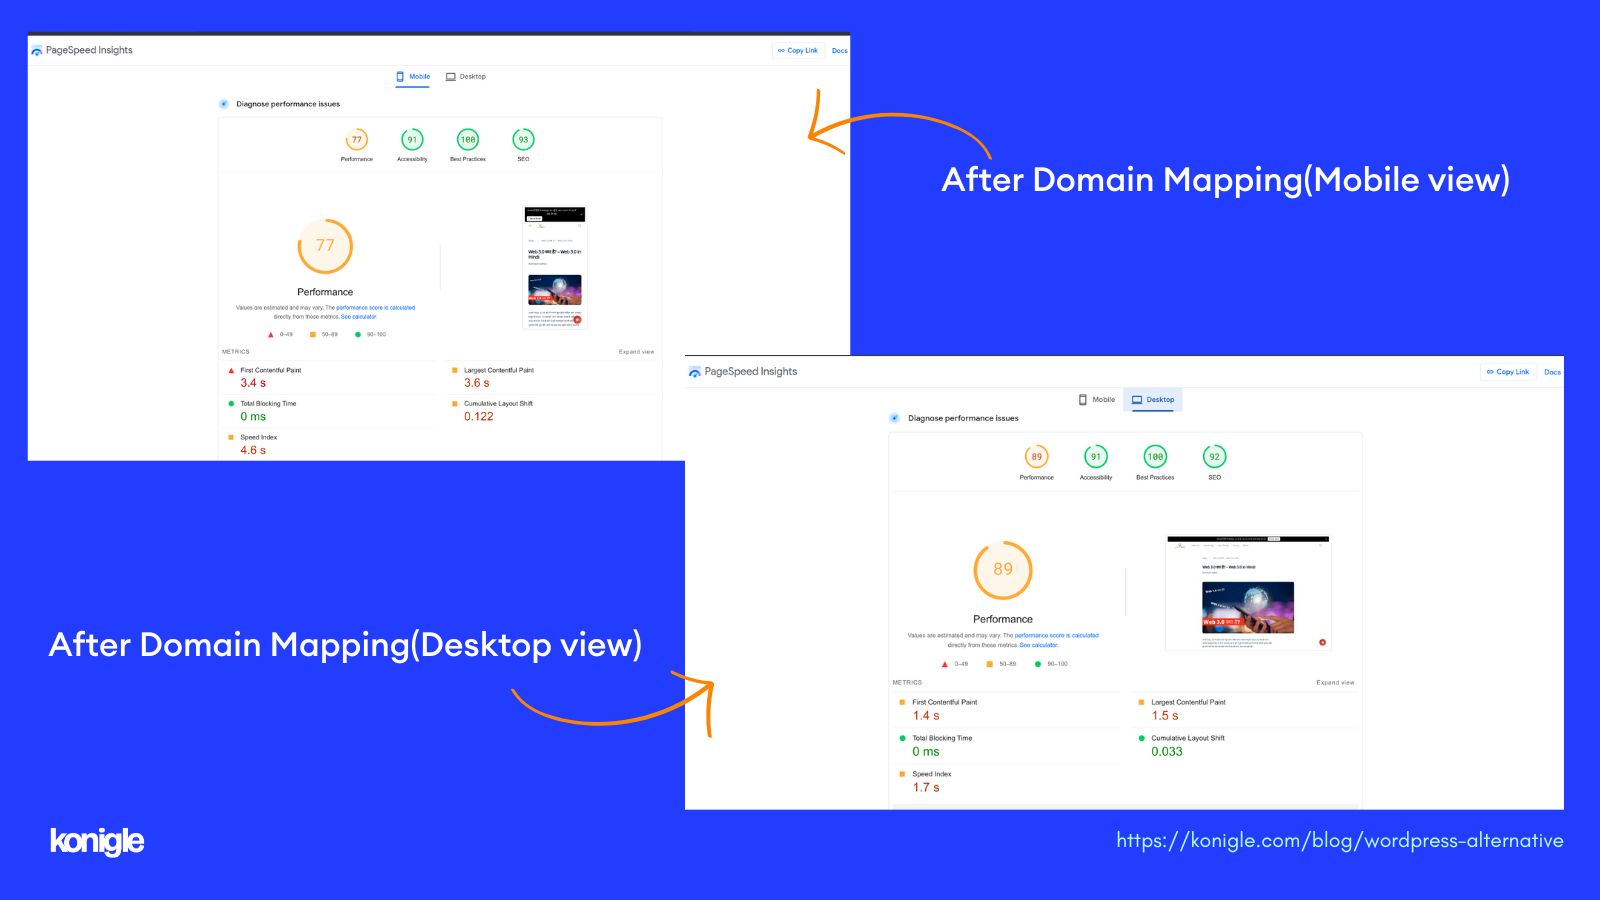
After uploading some content, I tested both platforms by running a blog post through PageSpeed Insights. I discovered that…
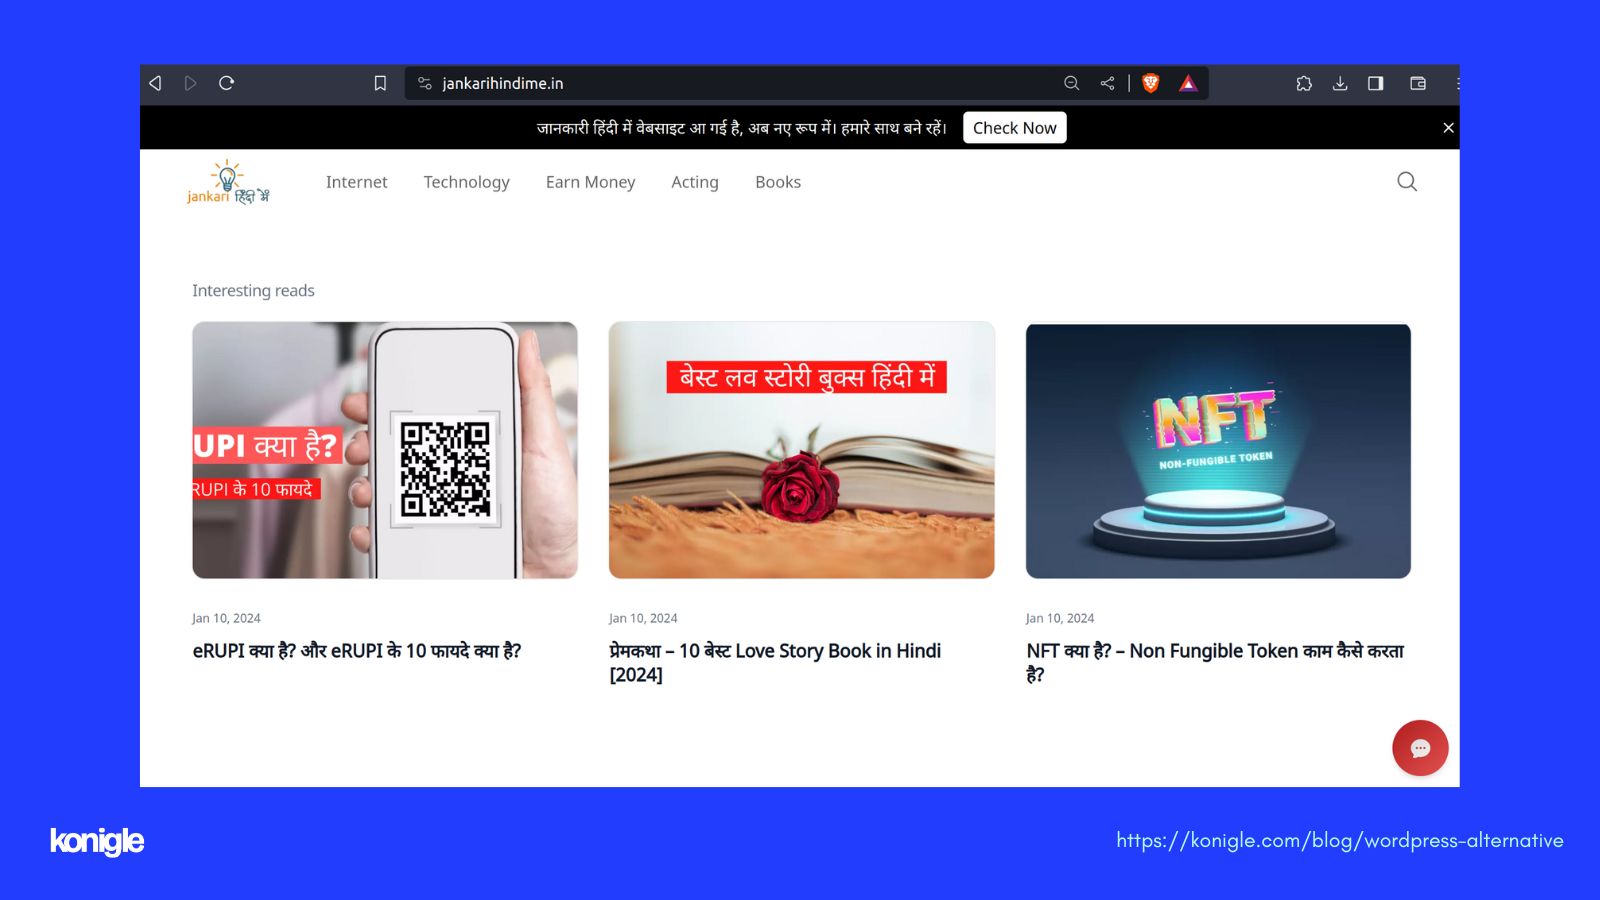
Jankari hindi me on Wordpress (Mobile view) Vs Konigle (Mobile view):
Jankari hindi me on Wordpress (Desktop view) Vs Konigle (Desktop view):
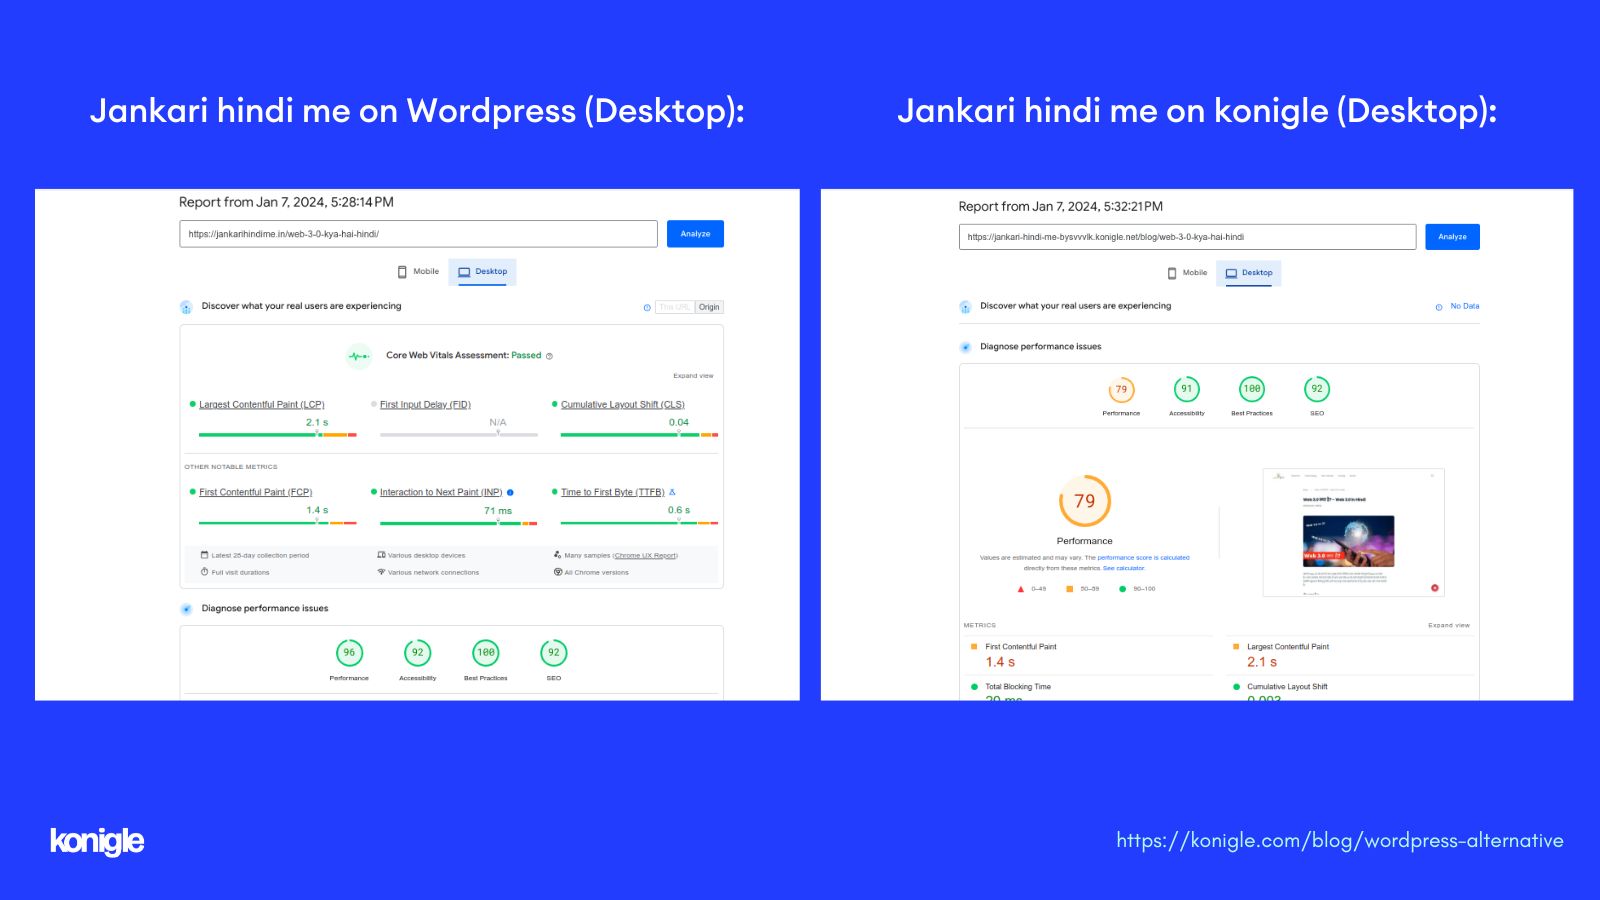
I noticed that except for performance, almost all practices are quite similar. I believe that once we effectively manage the performance-based scores, it will have a significant impact.
After two days of the above results, Konigle began providing WebP support for cover images. The results were surprisingly effective, as you can see below.
Jankari hindi me on konigle (Before webp format vs After webp format):

Performance increased impressively by 11, and the quality of the cover image also slightly improved.
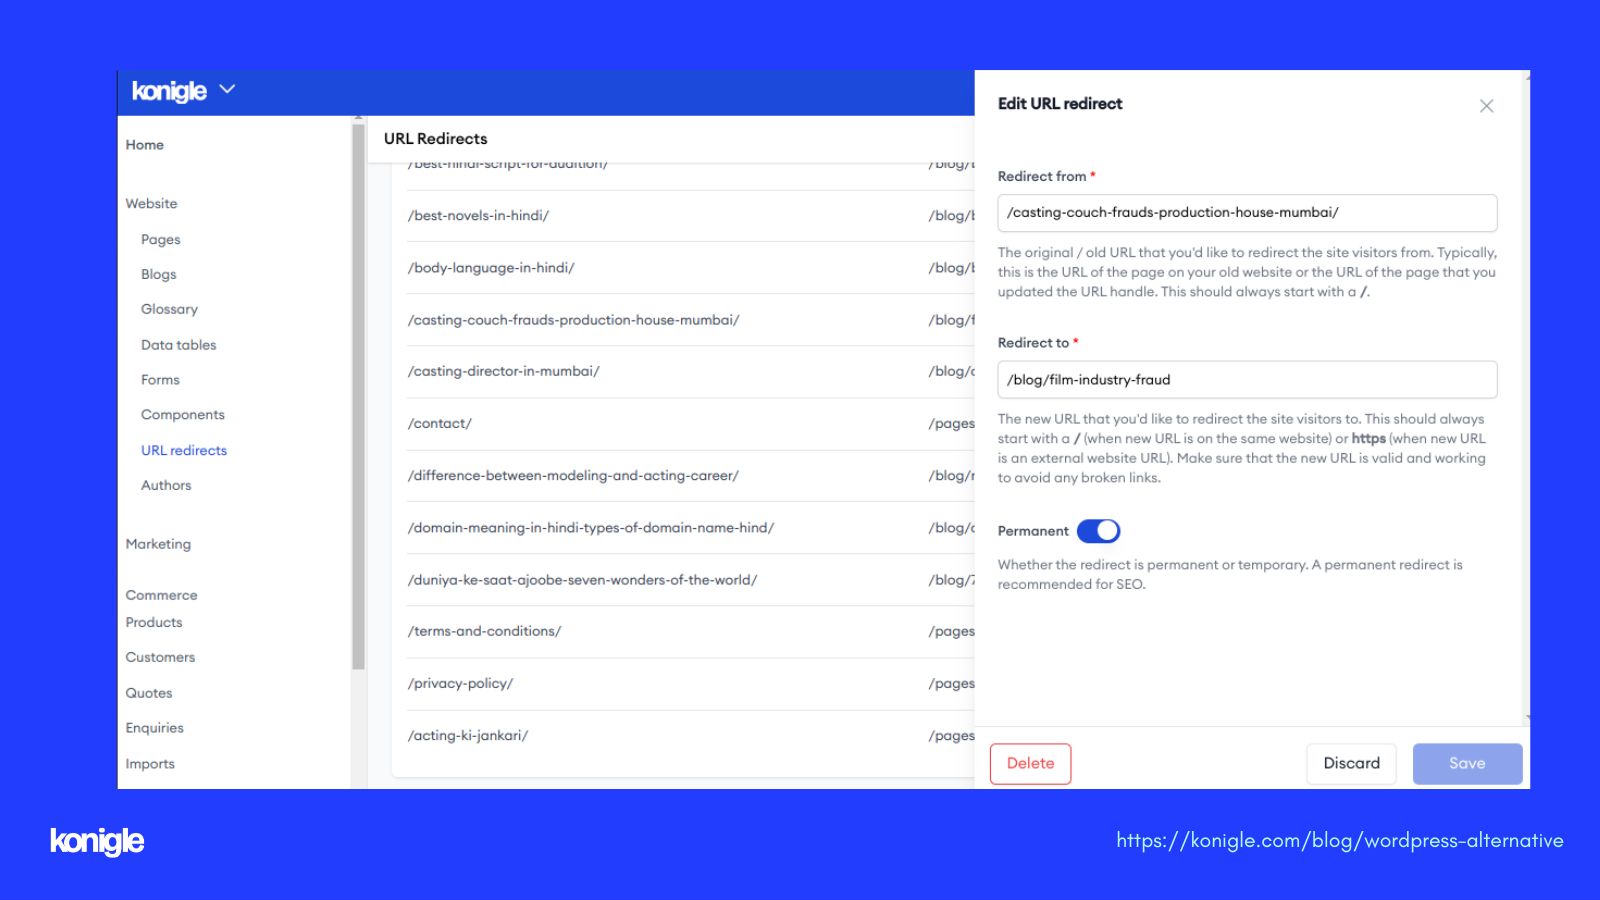
After uploading all the content from the previous "jankari hindi me" blog (Wordpress) to the new "jankari hindi me" (konigle), it is now time to redirect the URLs.
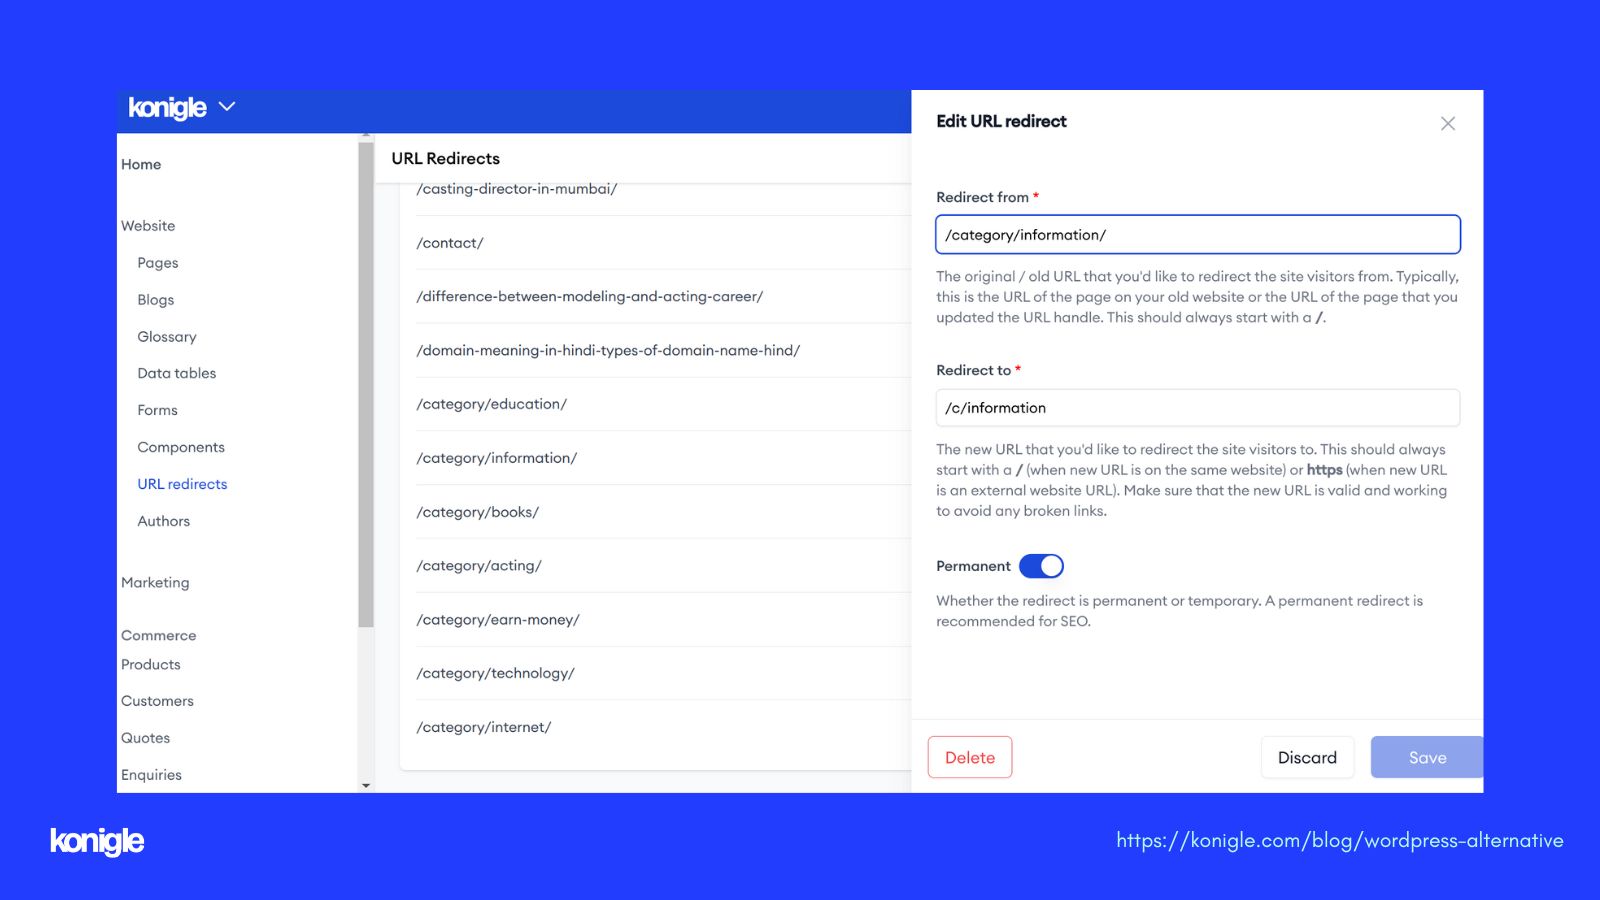
I used Konigle's redirection feature and it blew my mind. I realized that it gives me a chance to re-optimize my URLs for better SEO and website performance.
If you see the image below, you will notice that I have added my old URL for redirection to new optimized URLs. I also appreciate the choice between temporary and permanent URLs for redirects. It is recommended to use a permanent redirect for SEO purposes.
After redirecting all blogs and pages, I also redirected the category pages. For this, I created a separate folder for each category inside the Konigle admin. Then, I redirected each old URL to the corresponding new one.
It's now time to go live with Jankari Hindi Me website on the Konigle platform. The last step is domain mapping. For this, I added a DNS record to my domain provider account (Godaddy) and targeted it to my subdomain, which was provided by Konigle when I created my account.
After mapping and issuing an SSL certificate through Konigle, Jankari Hindi Me has finally been launched with a new look. It's the first WordPress website on the Konigle platform. The site is now live and can be accessed through the following URL: https://jankarihindime.in/.
Here are the performance results after domain mapping for the same blog post that we checked earlier.
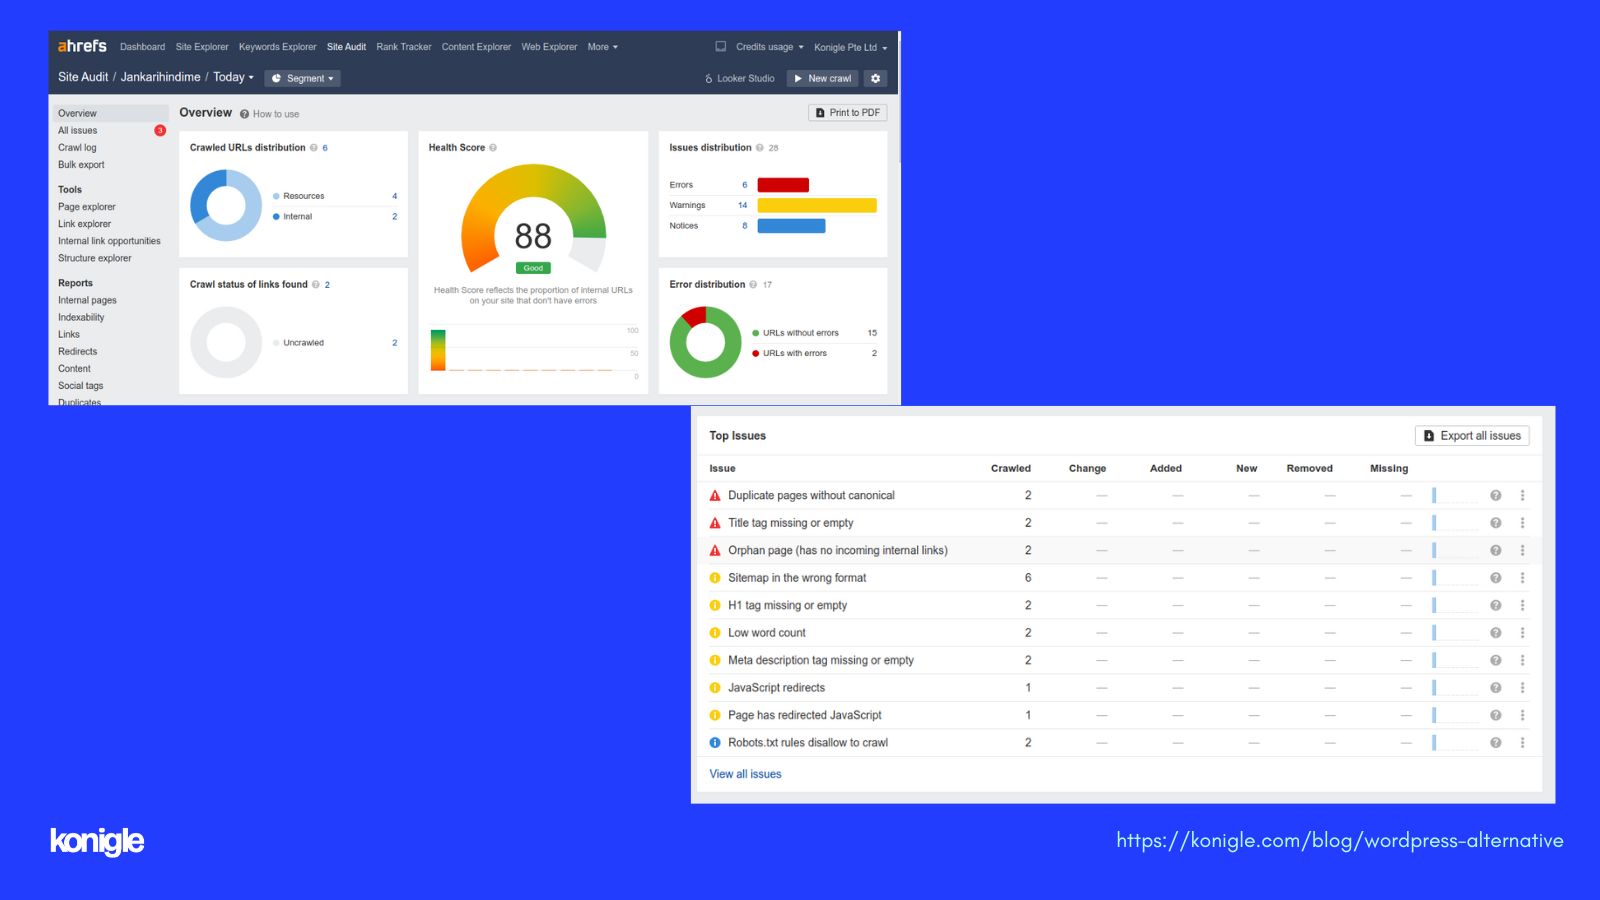
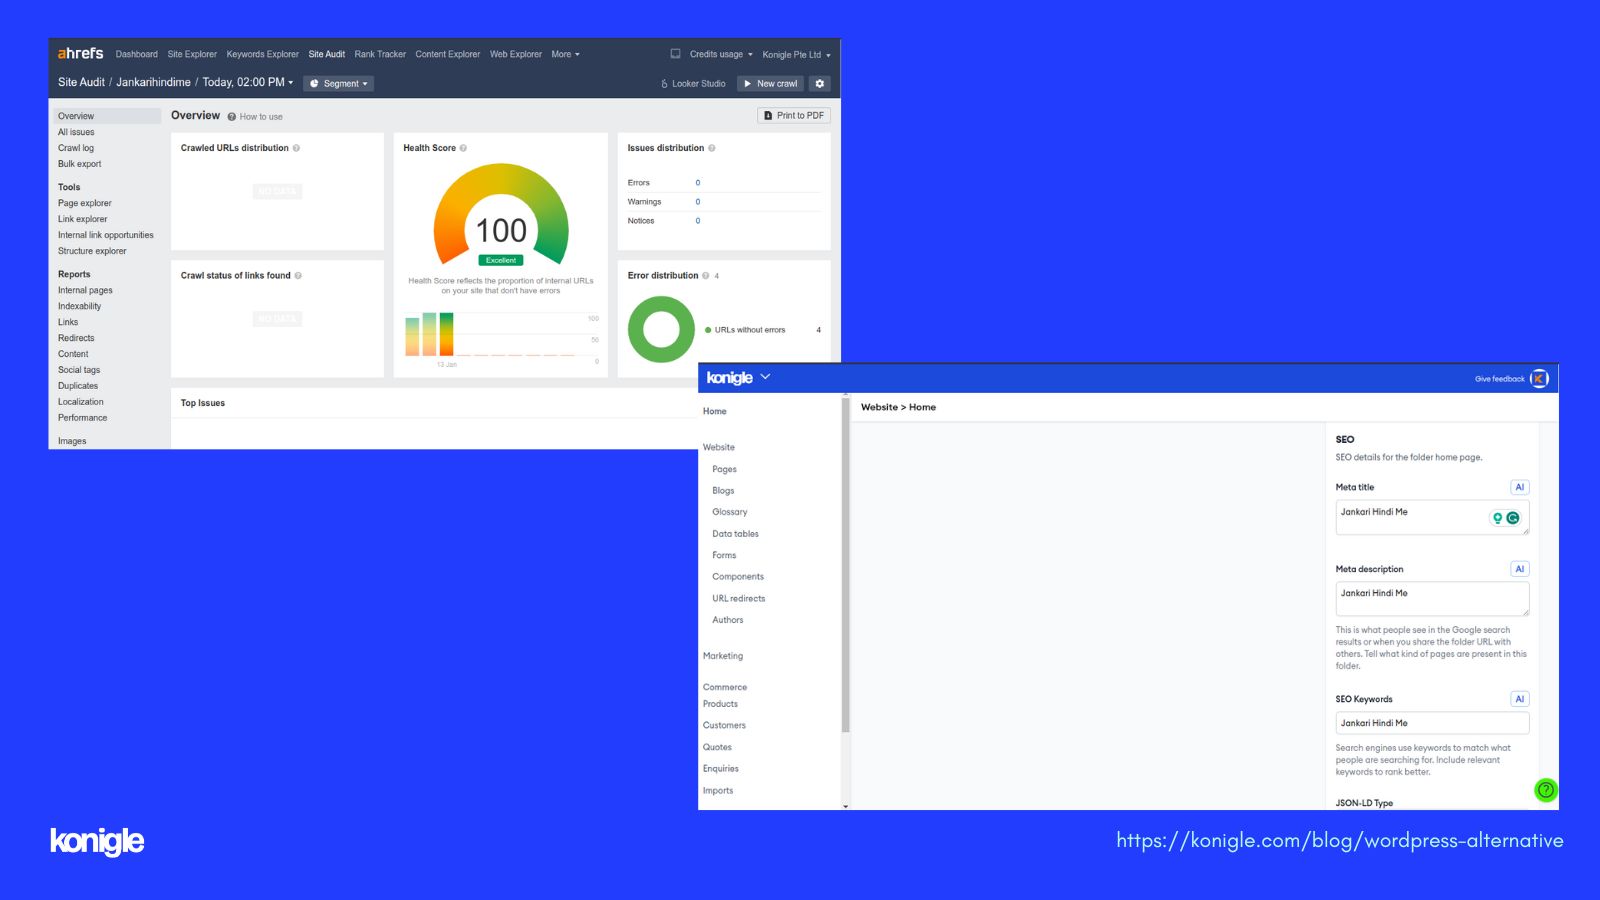
I conducted a site audit using Ahrefs and here are the results: I found three major errors along with some warnings. The health score of the website is 88.
Konigle also suggests that I sign up for cloudflare.com and connect the Name Servers to Cloudflare. After linking the website to Cloudflare and adding SEO title, description, and keywords to the homepage/folder, I conducted another crawl. The results were remarkable; all issues were resolved, and the health score goes to 100. This is very impressive.
After launching the website, I tried to set up AdSense for revenue generation. However, I faced issues in verifying the site when linking the AdSense account with Tag Manager, despite several attempts.
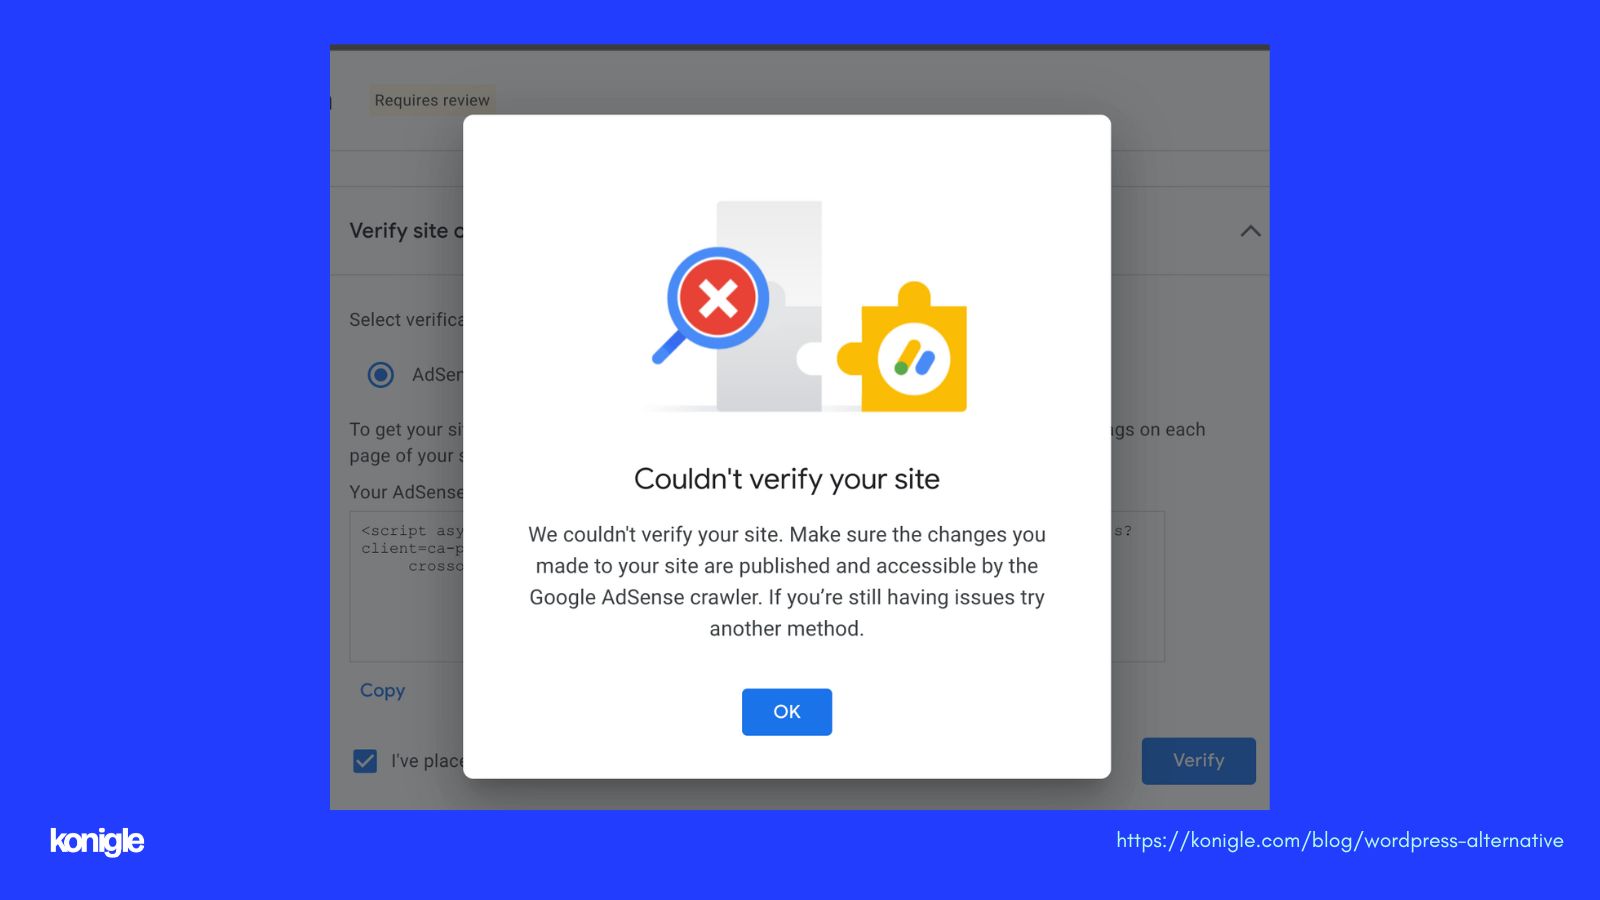
So, I have requested a feature from Konigle to link my AdSense account through the admin panel.
Eventually, Konigle offered AdSense verification support in the site verification section. I uploaded the ads.txt file to Konigle and it was successfully verified. I have also enabled auto-ads on Jankari Hindi Me.
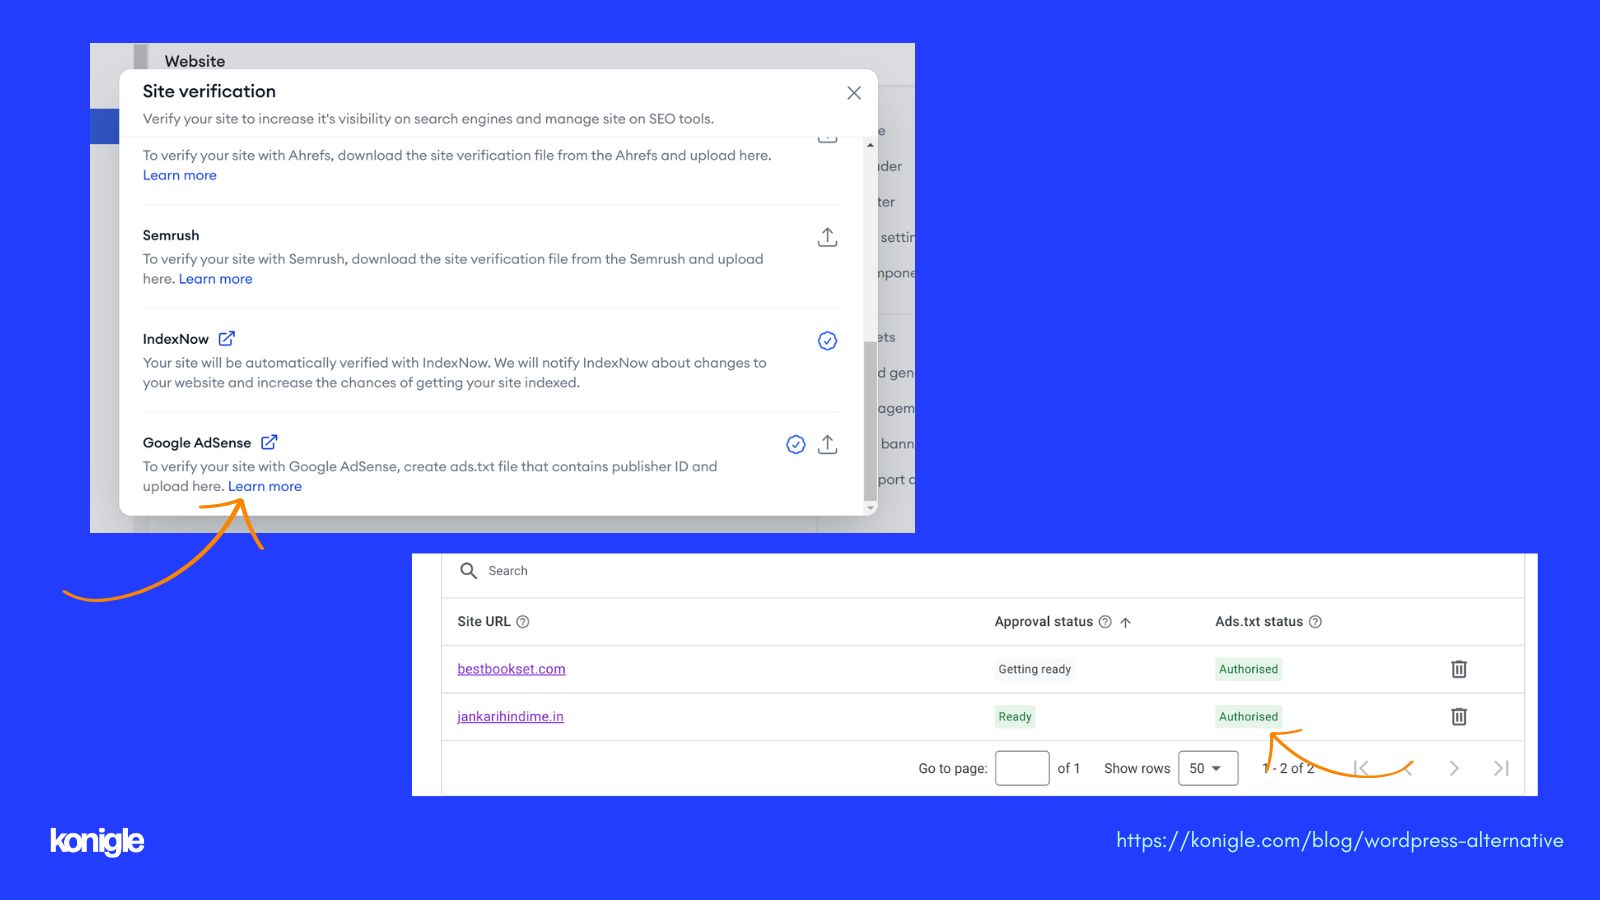
After verification, I found that 'Jankari Hindi Me' is able to display ads.
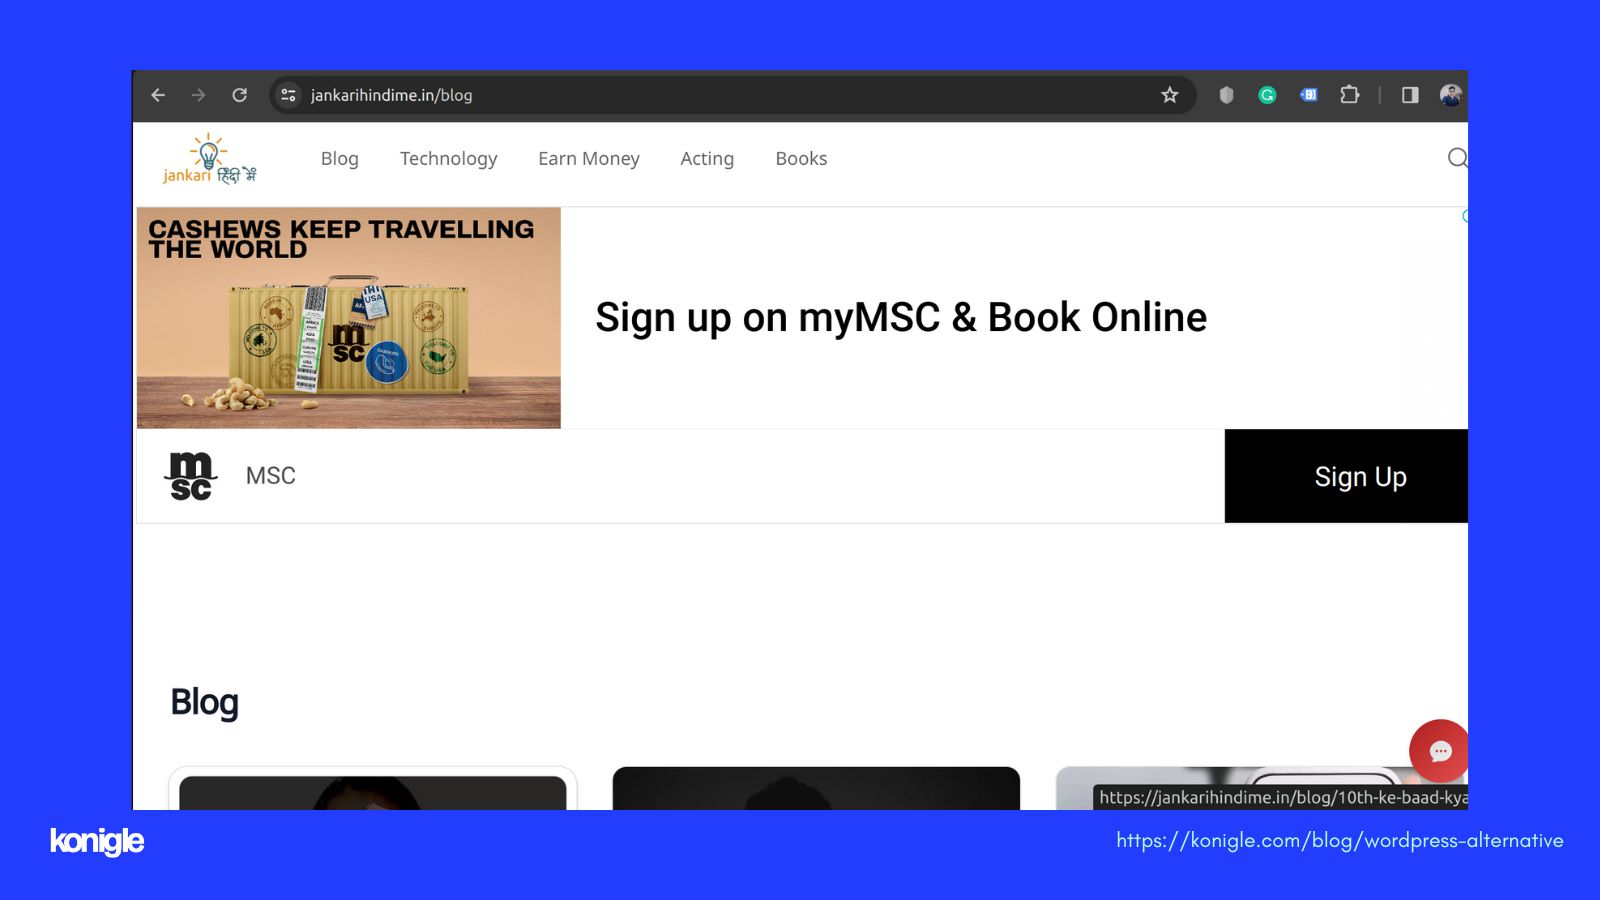
Hurray, it's finally done!
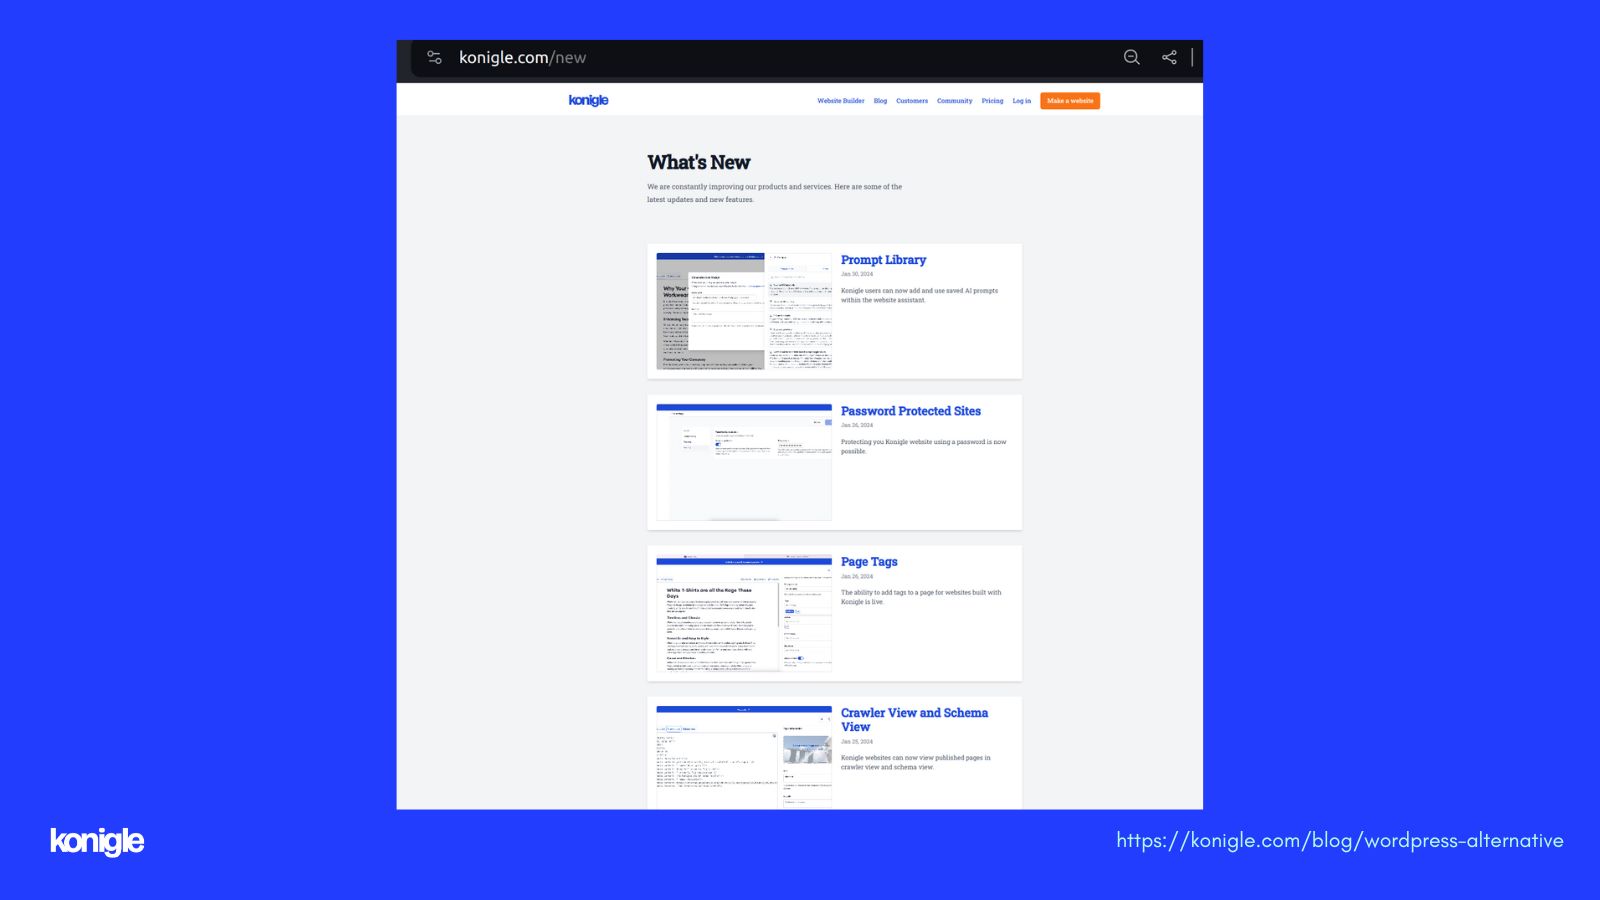
Konigle is constantly adding new features that are truly impressive.
Personally, I liked some features which are:
- Prompt library - I can use AI prompts within the website. This significantly reduces my time and effort in creating high-quality content for my website.
- Page tags - I can assign a tag to my pages to group them under one tag, which is highly convenient.
- Robot.txt plugin - Konigle introduces a robots.txt file, which helps protect my website from unwanted bot crawls.
Here are the latest additions that you can explore. More features are coming, and I know they will help me boost my website to new heights.
Overall, I did need to invest some time to familiarize myself with the platform's features and settings, but once I got the hang of it, I was able to successfully recreate most of my WordPress site on Konigle and make it more performant.
Despite some limitations and missing features that I previously enjoyed in WordPress, I greatly appreciate the simplicity and user-friendliness of the Konigle web builder. Its continuous launch of new, beneficial features contributes to my website's growth.